Textures for your 3D home design
Textures are essential for the appearance of elements and surfaces in any 3D design software. They make surfaces look as if they were made of a “real” material, e.g. Roof Tiles, Wood, Concrete, Metal, Bricks etc. In some other software products, textures are only used in combination with materials. In Visual Building we have separated the two for easier handling and have our own catalog for textures and materials.
All Visual Building versions contain a standard catalog with several thousand textures that you can use to design your apartment or building. Textures in Visual Building can be found in the catalog on the right side of the software. The catalog itself represents a normal directory structure, which we have sorted thematically.
For better handling, we use preview pictures that represent a directory and are marked with a small folder symbol as well as the preview pictures of the textures themselves.
Navigate within the catalog like in a Windows Explorer by double-clicking in the next directory level until you have found the desired texture. Double-clicking on a texture preview in the catalog opens a preview dialog with an enlarged view of the texture.

More topics
- Navigation in 2D / 3D
- Create Floor Plans
- Windows and doors
- Insert stairs
- Copy Floors
- Roof Construction
- Building Plans
- Section views
- Elevation views
- 3D Floor Plans
- Become a 3D Architect
- Loft conversion
- Fire Escape Plans
- 2D Symbols
- House Plan Layout
- 3D Constructions
- Home Design Software
- Using 3D Objects
- Using Textures
- Material properties
- 3D Visualization
- Timber frame
Using textures from the catalog for your house design
Textures are simply dragged and dropped from the catalog into a Visual Building 3D view and placed on the desired surface. So click on a texture in our catalog and drag it into a 3D view while holding the left mouse button down. Point with our mouse cursor at the desired surface and release the left mouse button. This automatically changes the texture on the surface. That's it.
Changing textures on walls
Walls are a special case of texturing. Visual Building tries to support you here by noting that a texture has been dropped onto a wall side and differentiates whether the wall side represents an outer wall or belongs to a room.
As a consequence, Visual Building automatically transfers the texture to all other outer walls or all other walls of a room, so that you do not have to drop the texture multiple times. If you do not want this, e.g. you want to drop a texture onto a special wall only, keep the CTRL key pressed while dragging and dropping.
Here is a short video about textures:
What is a texture and how can I use my own textures?
As already mentioned, textures are images of surfaces or materials. Visual Building supports the file formats JPG, PNG or BMP. If you can not find anything suitable in our catalog, you can search for textures on the Internet or download them from a specialized website. An example of such a website is www.mtextur.com.
Then simply save the downloaded texture in our standard catalog, which is in the TEXTURES folder of your Visual Building installation, e.g. C: \ PROGRAM Files \ Visual Building… .. \ TEXTURES or a sub-directory of it. From there you can use the texture directly as usual. This easy way to save an image and use it as a texture is the main reason why we use two different categories for textures and materials.
Note: the file size and the resolution of your own textures should be reasonable. If necessary, reduce the images beforehand in an image processing software. It makes no sense in a 3D architectural visualization to use a texture with a resolution of 3000 x 4000 pixels while the display shows only 1920 x 1080 and you are not “looking” at a wall texture with a distance of 50 cm. Otherwise it can easily happen that very large textures cost a lot of RAM and performance. If you don’t want to miss a nice texture and you don’t know how to reduce it just send it over to customercare@visualbuilding.co.uk and we will do that for you.
Texture coordinates - how are textures displayed and how do I change the size of a texture?
Textures are usually tiled on surfaces, i.e. repeated in all directions from the starting point, just like a real tile on a real wall.
Since an image does not contain any information about its size or how large the area is that the image represents, you have to specify these values in a 3D Home Design software. By default Visual Building assumes that a texture shows an area of 1 x 1 m. If the area of an element is larger, e.g. a wall side, then the texture is tiled based on its dimensions. The size of a texture and other settings are generally called "texture coordinates". These coordinates are also available in Visual Building, once in the texture dialog of our catalog and once directly as a property of the element on which this texture is located. There you will find a control for the texture coordinates and the rotation.
The correct coordinates depend on the content of the texture image. If e.g. the picture shows 15 bricks next to each other and you assume that each is 15 cm wide, the width of the texture must be 15 x 15 cm = 2.25 m
We have already preset many of the textures in our catalogs with reasonable values. The rest is a matter of taste. And if you have downloaded your own textures from the Internet, you will have to define the correct values yourself.
Note: the texture coordinates on ready-to-use 3D models / 3D objects are already defined during modeling and cannot be changed easily. For this you would need the PlugIn 3D converter. However, it rarely happens that this is necessary.
The following short video uses two examples to show what the texture coordinate control looks like and how changes affect a surface.
Seamless textures
Since textures are usually tiled, the texture image must be able to be put together without any visible differences. This applies to the pattern in the image as well as to the distribution of light in it. Therefore, in most cases you can not use normal photos for textures, because there is always a light gradient, caused by shadows, position of the light sources, etc.
Textures should therefore be seamless, otherwise you have negative effects in the visualization. If you are looking for textures on the Internet, you should therefore search for "seamless", e.g. for “Seamless brick textures”.
Textures should therefore be seamless, otherwise you have negative effects in the visualization. If you are looking for textures on the Internet, you should therefore search for "seamless", e.g. for “Seamless brick textures”.
Transferring textures or materials to other components
If you are already using a texture or a material in a 3D view, you can simply transfer it to other elements so that you do not have to search for it every time in the catalog.
There are the functions “Transfer material” and “Transfer texture” on our 3D Functions Ribbon. Choose e.g. "Transfer material", then click in 3D on the area that shows the source material and then one or more times on the areas that you want to take on the same material. Finish the process with ESC.
If you hold the SHIFT key pressed, the texture coordinates are also transferred, otherwise only the pure image.
What is the difference between a texture and a material?
Textures are just simple pictures. How a surface looks in a 3D visualization depends largely on the material. The material e.g. determines whether a surface is transparent, i.e. looks like glass, whether it is glossy or matt or how bright and dark it looks. All this is determined by material settings.
Read more about materials.
Read more about materials.


Visual Building Basic
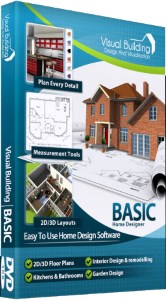
Has been developed as an easy to use design and visualisation tool for self builder,extentions..
£60.00
List price
List price
£39.00
Special online offer
Special online offer
Visual Building PRO
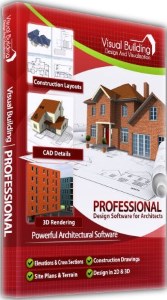
Used by all user groups specifically to create professional plans...
£120.00
List price
List price
£99.00
Special online offer
Special online offer
Visual Building Premium
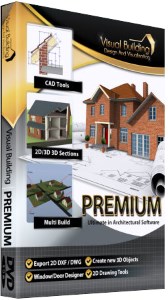
Our most powerful design and visualisation tool specifically created for ...
£180.00
List price
List price
£149.00
Special online offer
Special online offer