Copy Floors in Visual Building
Within Visual Building you always create new floors by copying, regardless of whether you want to transfer elements from the currently active floor or not.
In a 3D building model as used in Visual Building both, the height of the floor and its position within the building are relevant. This will prevent you from creating multiple floors at the same level, which you would not recognize in simple 2D drawing software.
When creating a new project, a ground floor with a floor plan layer is automatically created at level zero, as described on the page "Create Floor Plan".
Usually you start your building planning there, because often the ground floor has the most identical elements with the following floors, e.g. the outer walls and possibly the windows.
Starting from the ground floor, you work your way up or down through the building design. Visual Building automatically manages the floors for you based on the rough height.
More topics
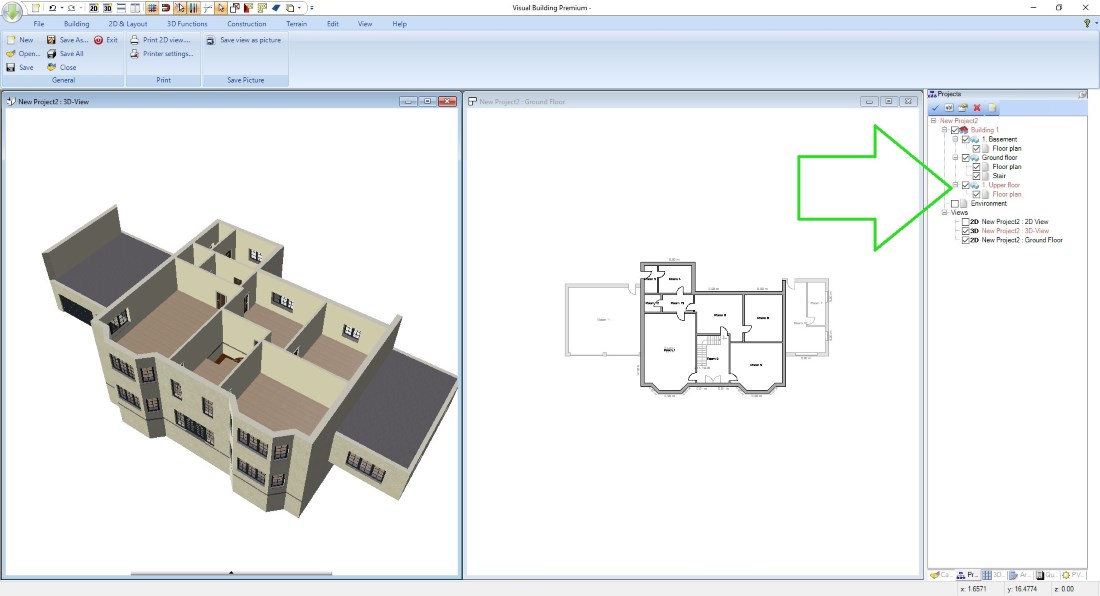
Create a cellar (a floor below your current)
In this case, you want to create a cellar below the Ground Floor. First select the ground floor of your building in the project viewer on the right edge of the software. This will become your source floor. And then the building entry inside the tree.
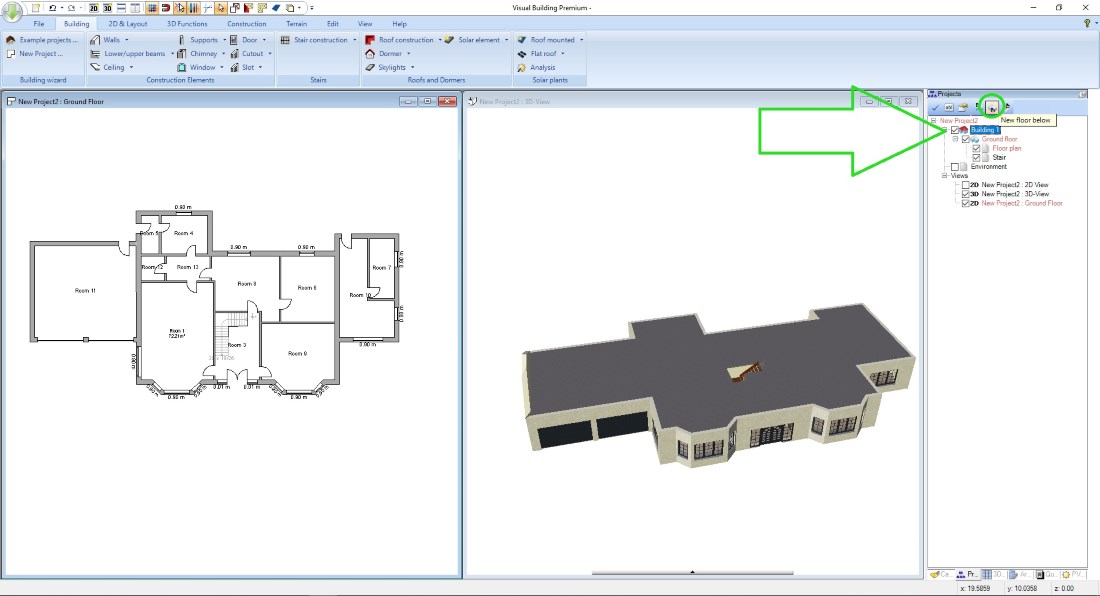
Now select the button "New Floor below" in our project viewers upper tool bar.
This opens the dialog for creating the new floor. On the page "General" you can first adjust the rough height. The level of the floor changes automatically.
On the Transfer page you determine which elements of the Source Floor that should be copied to the new floor below. As this example is the basement, we only activate walls, floors, ceilings, columns and doors in the transfer property dialog. We leave the windows unchecked.
TIP: In the vast majority of cases it is much easier to first copy and then delete unwanted elements or to adjust the floor plan with the "Edit Wall" tools. This is almost always faster than re-entering all components from scratch.
Here in the shown example the garage was copied, the front door and all interior walls. Deleting or repositioning is a matter of minutes.
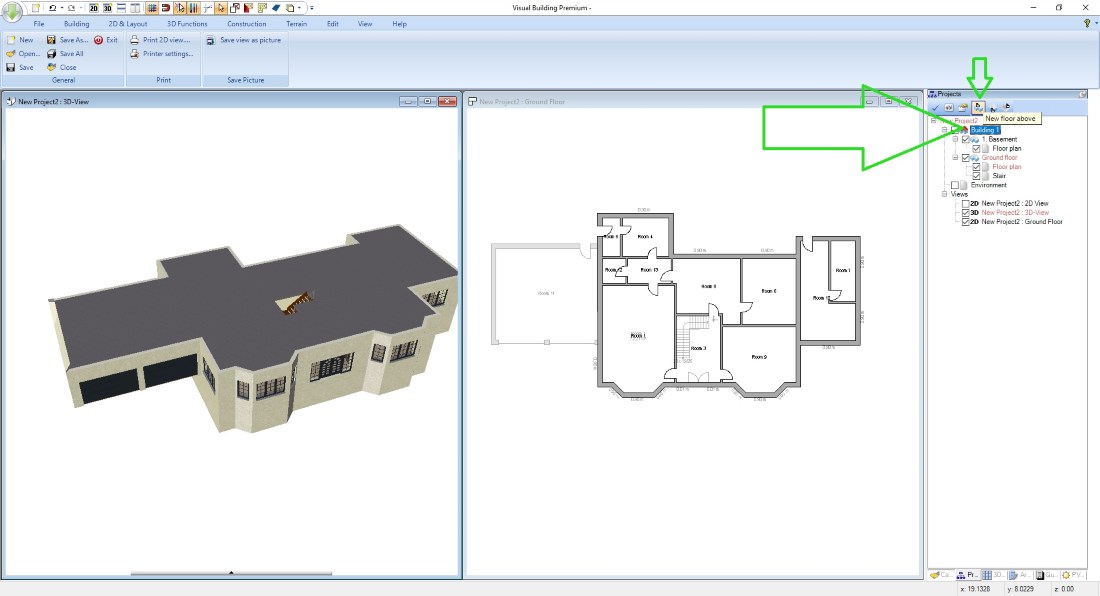
Create an upper floor (a floor above your current)
Again, first activate the Ground Floor as the starting level and click on "New Floor above".
If necessary, set the rough height and select from the list the elements to be copied to your new floor above.
The windows and all other elements are copied in this example.
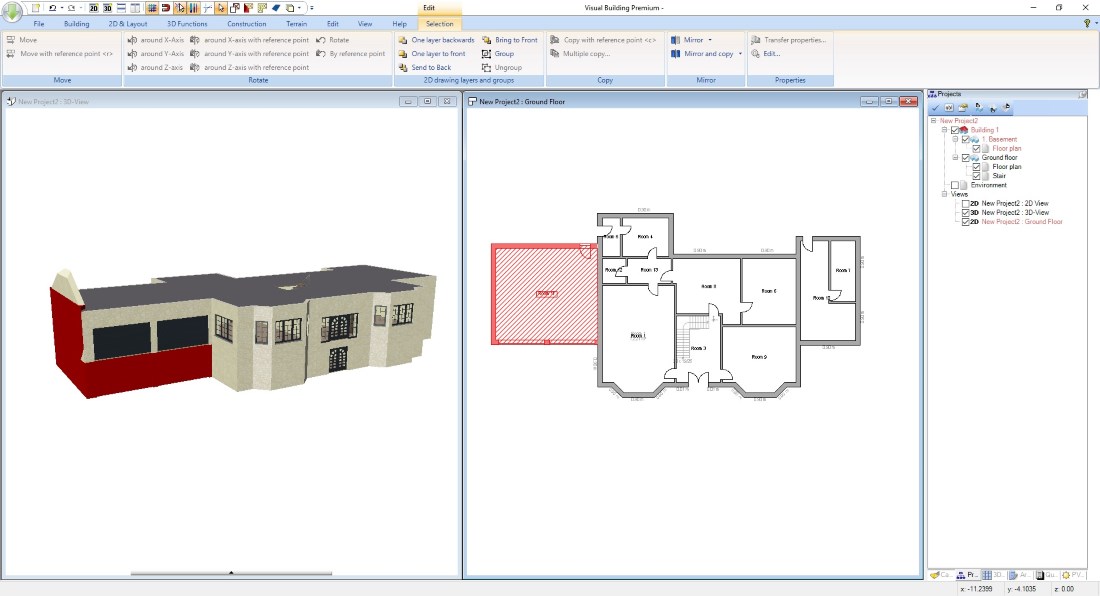
Then we select with a mouse frame the copied garage share in the upper floor and the floor plan parts of the building extension. Within seconds you have a new floor, the outer walls are exactly on top of each other and you can adjust the rest, moving or deleting the inner walls, insert new windows and doors or move existing, delete or copy unwanted elements.
The following video shows copying floors in the first few minutes followed by inserting roofs, which we will describe in a new topic.
If necessary, set the rough height and select from the list the elements to be copied to your new floor above.
The windows and all other elements are copied in this example.
Then we select with a mouse frame the copied garage share in the upper floor and the floor plan parts of the building extension. Within seconds you have a new floor, the outer walls are exactly on top of each other and you can adjust the rest, moving or deleting the inner walls, insert new windows and doors or move existing, delete or copy unwanted elements.
The following video shows copying floors in the first few minutes followed by inserting roofs, which we will describe in a new topic.
Visual Building Basic

Has been developed as an easy to use design and visualisation tool for self builder,extentions..
£60.00
List price
List price
£39.00
Special online offer
Special online offer
Visual Building PRO
Used by all user groups specifically to create professional plans...
£120.00
List price
List price
£99.00
Special online offer
Special online offer
Visual Building Premium
Our most powerful design and visualisation tool specifically created for ...
£180.00
List price
List price
£149.00
Special online offer
Special online offer