Stairs
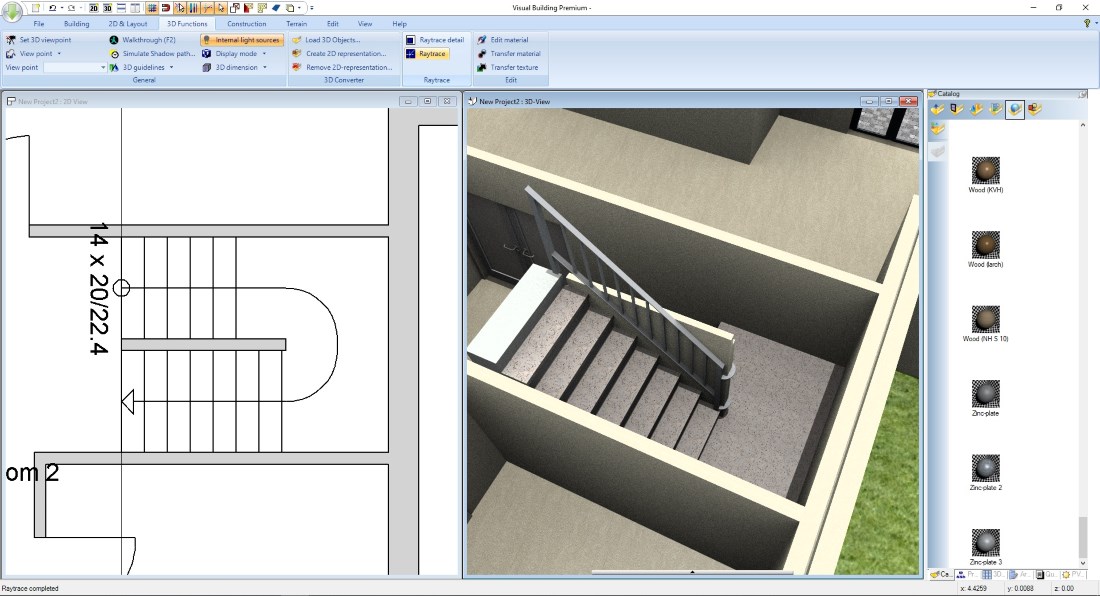
Stairs can be entered as either straight, polygonal, or incorporating a landing.
All variants can be designed as either concrete or wood construction by simply changing the construction type in the dialog.
The stair editor automatically determines the stair dimensions (width, steps) depending upon the placement position. These initial values can then be adjusted.
Wells are automatically added.
Railings are part of the stairs for both sides and can be edited from within the stair property dialog.
Several automatic 2D representation options for stairs are included.
More topics
- Navigation in 2D / 3D
- Create Floor Plans
- Windows and doors
- Insert stairs
- Copy Floors
- Roof Construction
- Building Plans
- Section views
- Elevation views
- 3D Floor Plans
- Become a 3D Architect
- Loft conversion
- Fire Escape Plans
- 2D Symbols
- House Plan Layout
- 3D Constructions
- Home Design Software
- Using 3D Objects
- Using Textures
- Material properties
- 3D Visualization
- Timber frame
Insert stairs
As already mentioned, there are three basic types of stairs. When inserting, you must therefore choose from one of the three buttons which type you want to create.
In addition, only two points have to be considered:
- Check whether the correct layer is active in our project viewer on the right side of the software. The active layer is highlighted in red. If you want to create a stair from the ground floor to the first floor, you have to activate the Ground Floor – Floor Plan layer first
- Often it is necessary to show the stair of a floor below your current in your floor plan. So if you want to display the stairs of the Ground Floor in the drawing for the upper floor for example, create an additional layer for the stairs in your ground floor hierarchy and insert the stairs on it. Later you can set the ground floor – floor plan invisible and leave the stair layer visible.
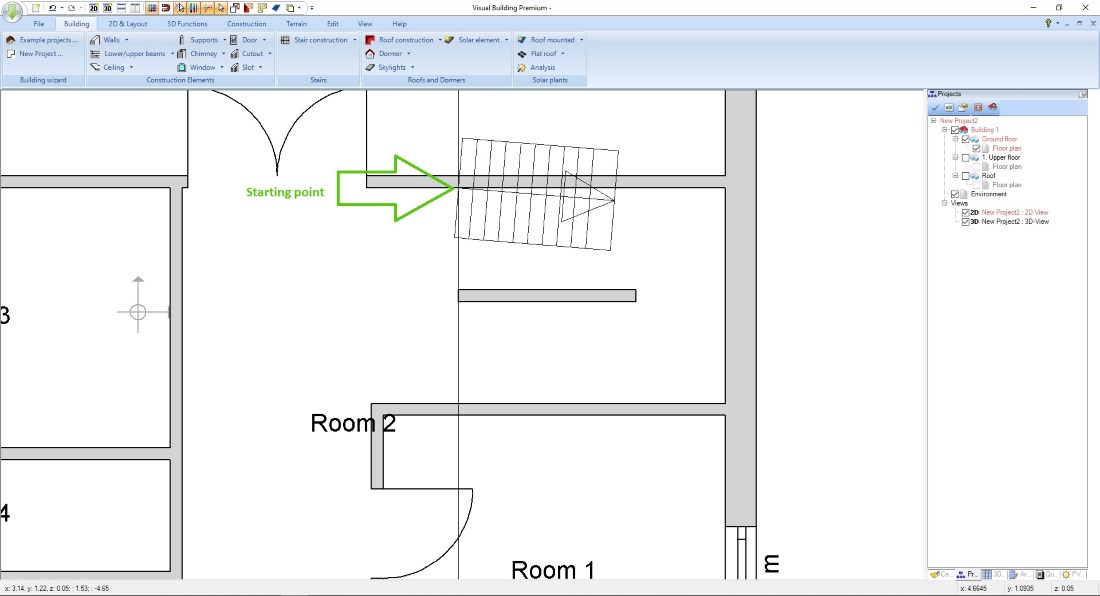
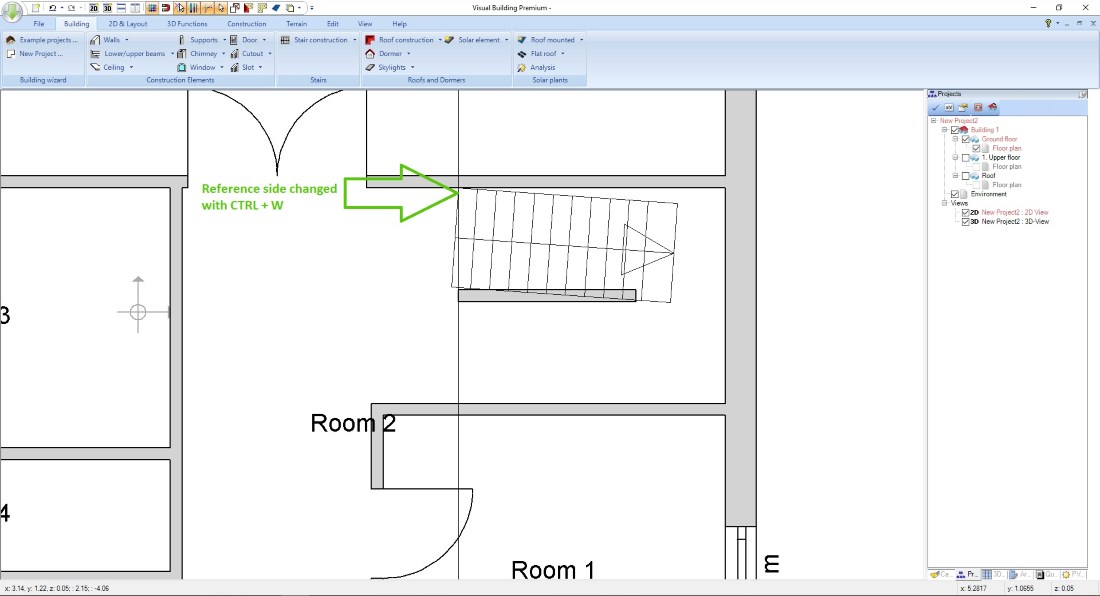
The stairs are entered after selecting the correct input variant by setting the starting point. Often this is a point on a wall edge, as seen in the example. By default this point corresponds to the axis of the stair. When inputting via the inside edges of the walls, use CTRL + W to change the reference side of the stair. Also possible to press CTRL + W several times and toggle the stair sides under your cursor.
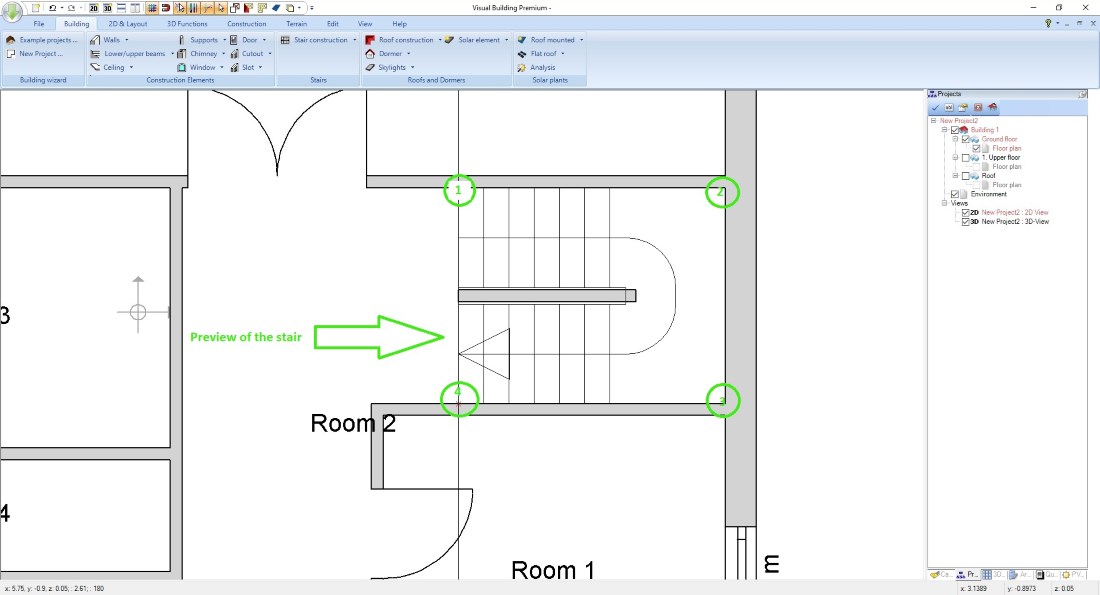
As soon as the right side of the stair is active, click on the corner points of the walls in the order as shown in our example image. While inserting the stair polygon, you will see a preview of the future stair for your orientation. Once you have set the last point, finish the process with ENTER or via the context menu on your right mouse button.
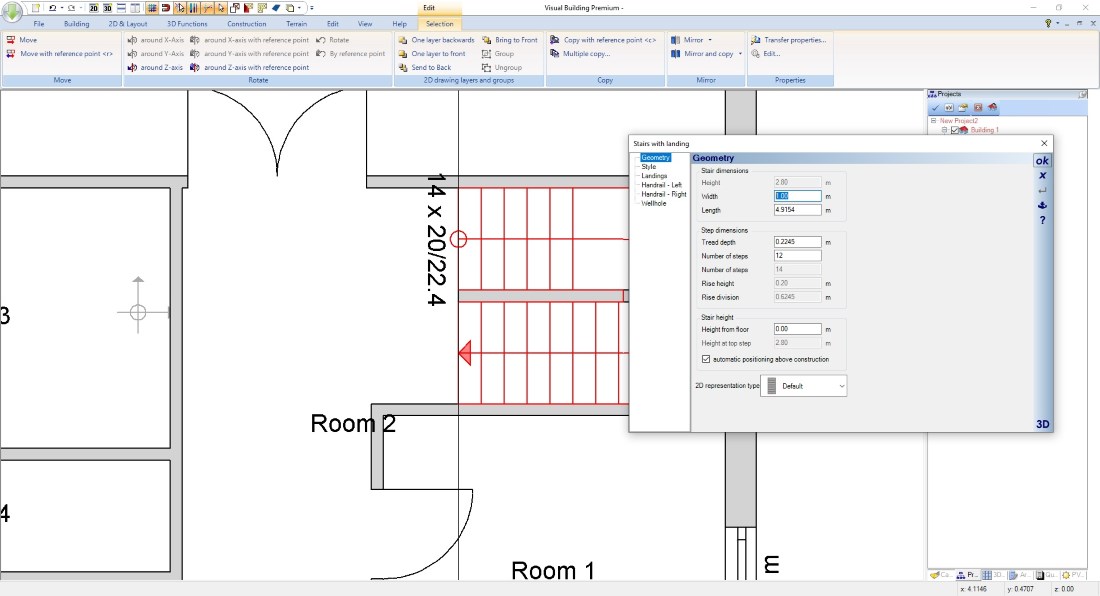
That automatically opens the stair dialog and allows further settings.
Only when you close the stair dialog with OK, the designed stair is inserted into the project.
In the stair dialog itself you will find all the properties for width, construction type, railings, etc.
Individual stair types can be achieved with our 3D Construction PlugIn, see our Visual Building training course document.
Change materials
As with all other 3D elements in Visual Building, you change the materials of stairs by dragging and dropping a texture from the catalog onto it in a 3D View.
Visual Building Basic
Has been developed as an easy to use design and visualisation tool for self builder,extentions..
£60.00
List price
List price
£39.00
Special online offer
Special online offer
Visual Building PRO
Used by all user groups specifically to create professional plans...
£120.00
List price
List price
£99.00
Special online offer
Special online offer
Visual Building Premium

Our most powerful design and visualisation tool specifically created for ...
£180.00
List price
List price
£149.00
Special online offer
Special online offer


