3D Floor Plan Software
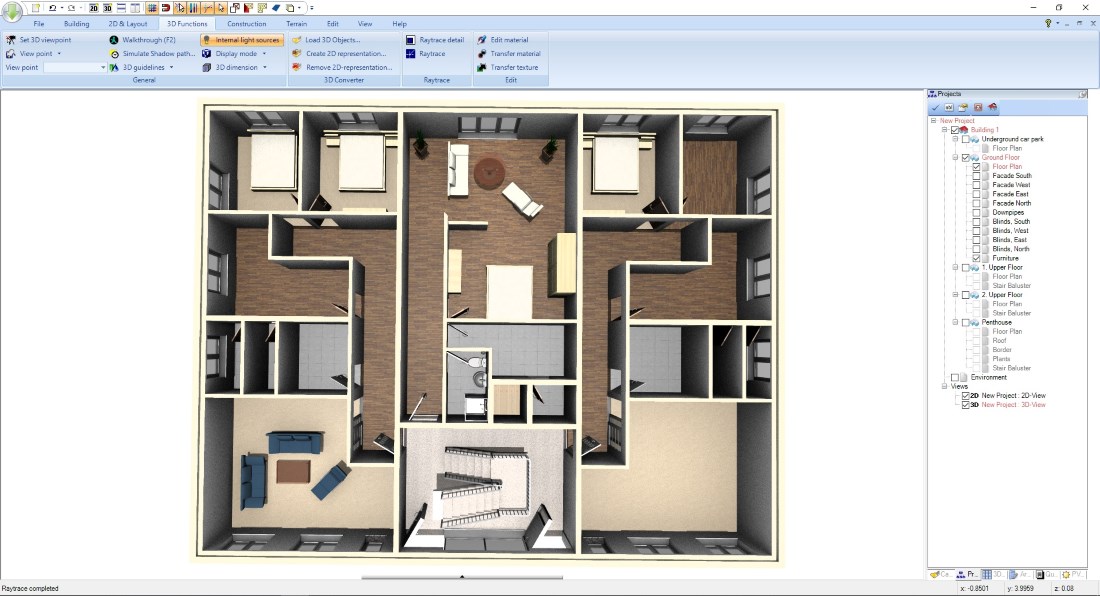
The good news is that 3D floor plans in Visual Building always exist automatically, whether you need them or not. And that does not cause any extra effort.
Whenever you draw something in Visual Building with our standard building features such as walls, windows, doors, etc., all this is based on the internal 3D model.
A 3D representation on this model can be created with a simple mouse click on the button "new 3D view". Unlike other programs, you do not switch between 2D and 3D, but everything runs in parallel. Automatically.
As usual in Visual Building you can also work directly in this 3D view, drag 3D objects from the catalog into the scene, change surfaces with the help of textures simply via drag and drop, or edit material settings of elements. Materials include other properties and can represent something like glass for example, so they can have a transparency, reflection, brightness, .... We describe these functions in our guides category "3D Home Design".
More topics
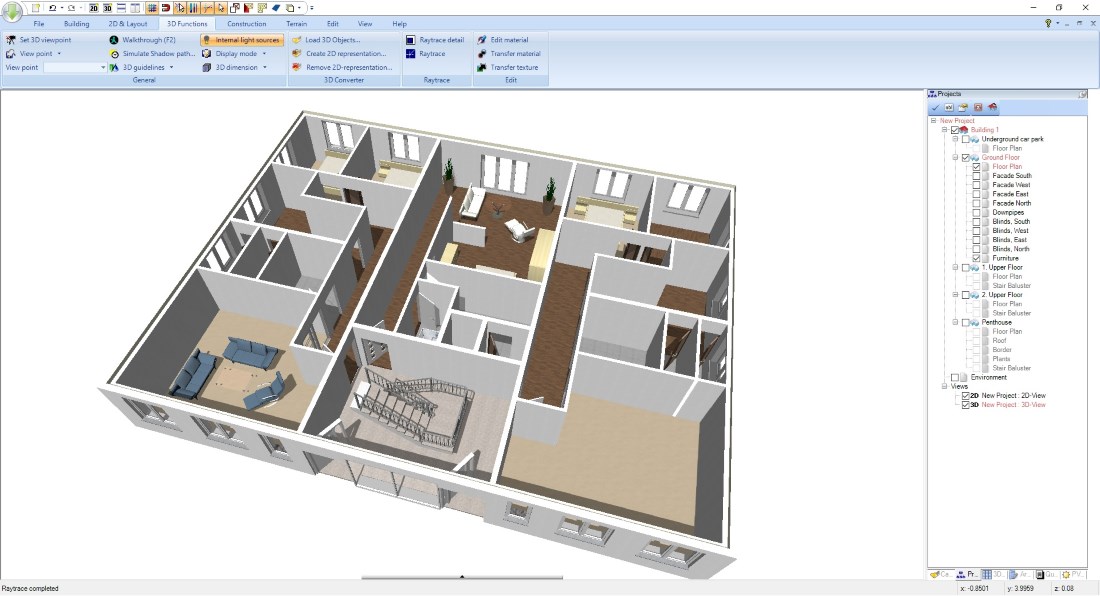
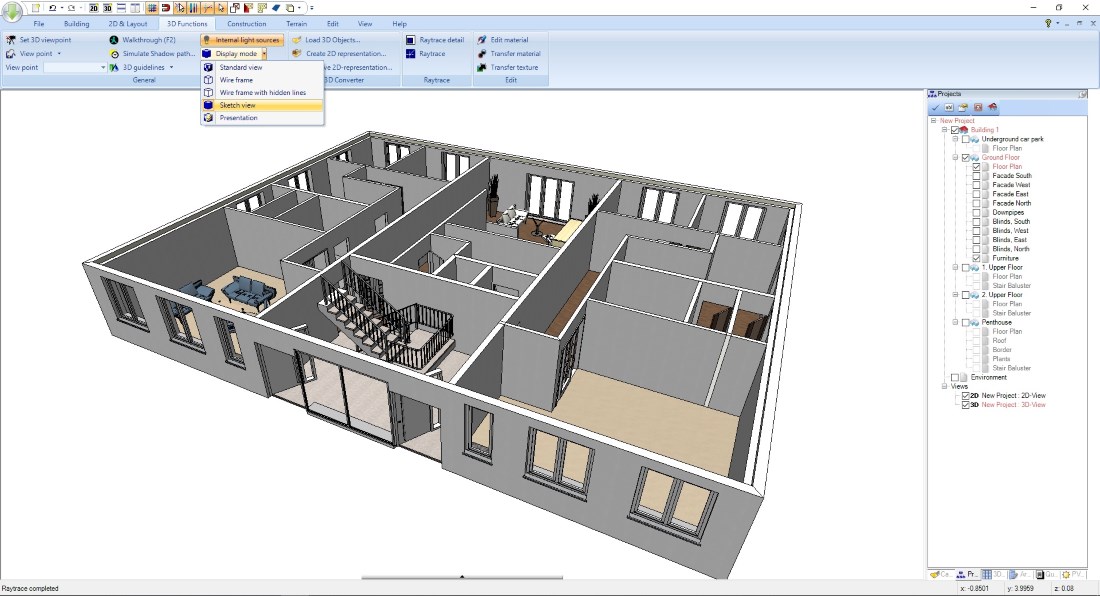
3D Floor Plans, display modes and viewer position
Depending on how you position yourself in 3D, you get a 3D view from above on the floor plan, or a perspective view. All this is controlled with your mouse combined with key shortcuts. For all navigation options, you will find a suitable Shortcuts PDF document in your Windows Start menu.
In addition to the variable position, the 3D view also offers different display modes as well as functions for calculating the lighting conditions (light and shadow), called raytracing. You can edit raytracing options by right-clicking on the Raytracing button on the 3D Functions ribbon.
For more about shadows and raytracing please read "3D Visualization of Buildings".
Further display options in 3D views are the sketch and the presentation view with real-time shadows. Both are available with a mouse click.
Save and print 3D Floor Plans as an image file (PNG, JPG, BMP,)
3D views are not printed directly. Instead, you save a picture of it, which you then send to your printer in another standard application of your Windows system, PAINT for example. The function for saving an image file from the currently active 3D view can be found on the FILE ribbon. While saving, you can specify an individual resolution and additionally activate raytracing options.
TIP: Activated raytracing makes no sense in sketch and presentation view mode, but without raytracing saving images is done in seconds. If your graphic card supports such a feature.
TIP: Activated raytracing makes no sense in sketch and presentation view mode, but without raytracing saving images is done in seconds. If your graphic card supports such a feature.
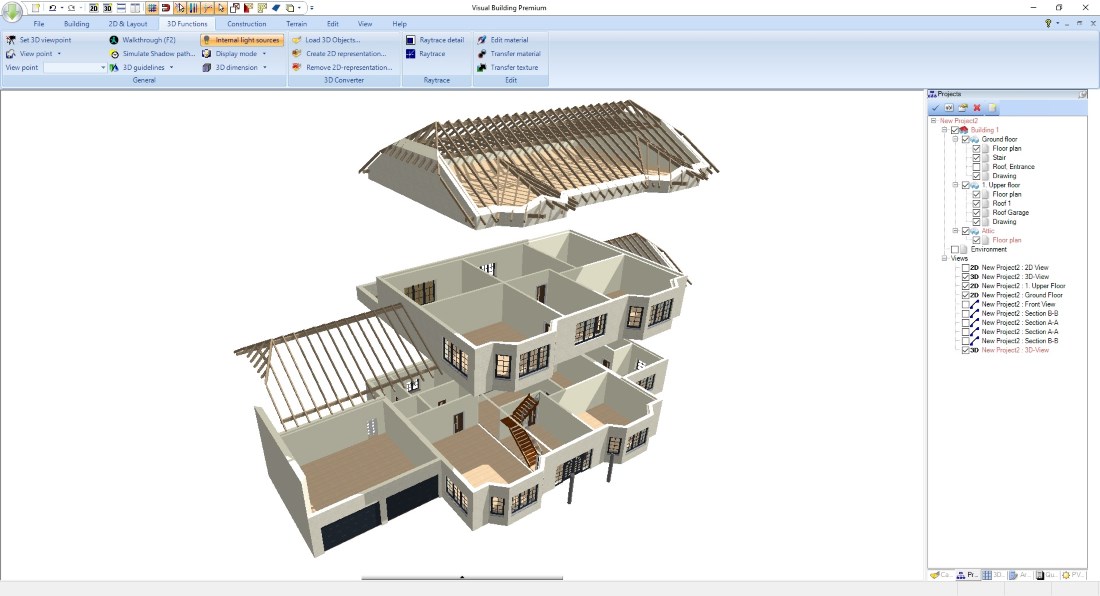
Exploded view of a building
This is just an impression what else you could get out of Visual Building.
In the Projects tab, right click on a floor, usually the top floor, select Properties and in the Level field, enter a new value to raise the floor. Select “Without Moving adjacent floors” in the appearing dialog and then OK. The selected floor will then be raised, exposing the floor below.
In the Projects tab, right click on a floor, usually the top floor, select Properties and in the Level field, enter a new value to raise the floor. Select “Without Moving adjacent floors” in the appearing dialog and then OK. The selected floor will then be raised, exposing the floor below.
Visual Building Basic

Has been developed as an easy to use design and visualisation tool for self builder,extentions..
£60.00
List price
List price
£39.00
Special online offer
Special online offer
Visual Building PRO
Used by all user groups specifically to create professional plans...
£120.00
List price
List price
£99.00
Special online offer
Special online offer
Visual Building Premium
Our most powerful design and visualisation tool specifically created for ...
£180.00
List price
List price
£149.00
Special online offer
Special online offer