Interior and exterior design with 3D Models
Every 3D design software uses 3D models, also called 3D objects, for the interior and exterior design. These 3D models can represent all types of elements or products, i.e. furniture, but also building components such as roller shutters, radiators, doors, etc.
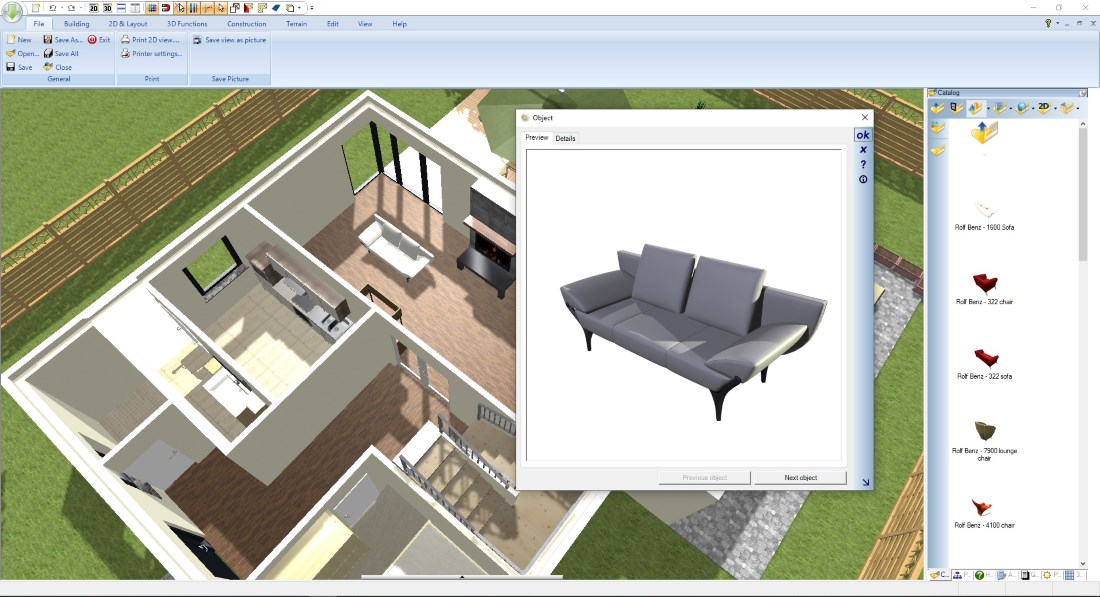
All Visual Building versions contain a standard catalogue with several thousand 3D models that you can use for the interior and exterior design of your apartment or building. 3D objects in Visual Building can be found in the catalogue on the right side of the software. The catalogue itself represents a normal directory structure, which we have sorted thematically.
For better handling, we use preview pictures representing a directory which are marked with a small folder symbol, and the preview pictures of the 3D objects themselves.
Navigate within the catalogues like in a Windows Explorer by double-clicking in the next directory level until you have found the desired 3D model. A double-click on a catalogue entry opens a preview dialog.
More topics
Inserting 3D Objects from the catalogue into your planning
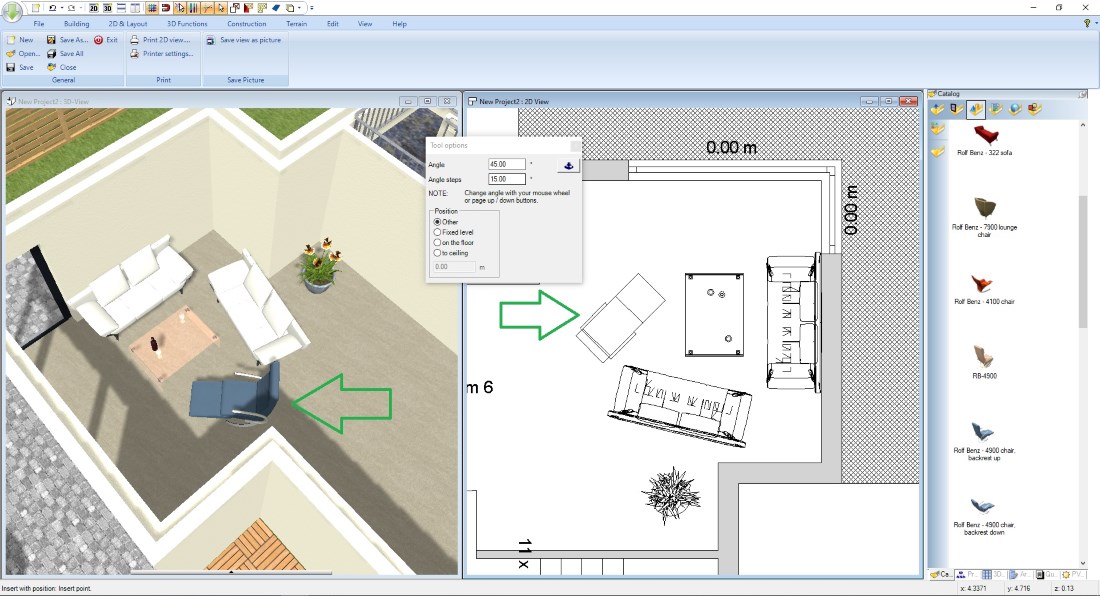
Generally you simply drag everything from the catalogues into one of the Visual Building views while holding down the left mouse button. Please note that the objects are automatically inserted on your active layer of the respective view. So you should first make sure that you have activated the correct layer in our project viewer so that furniture does not end up on the attic instead of the ground floor.
Now drag the 3D object into a view and release the left mouse button. The 3D model now adds a preview to your mouse cursor and is waiting to be placed. As long as this has not yet happened, you can turn it with the mouse wheel or change the corner points with CTRL + W. At this point, the exact positioning or rotation is not important.
Then simply click with the left mouse button and the 3D object is inserted into the project. The process does not end automatically, but Visual Building now expects the input of further 3D objects. So you can for example place six chairs around a table in one step without having to drag and drop each time. When you are finished, press the ESC key.
Tip: when you place an object in a 3D view, Visual Building automatically recognizes which surface the mouse is pointing at, e.g. the top surface of a table, and gives the 3D object a corresponding height. So if you want to put a 3D red wine bottle on a 3D table, the easiest way is in 3D. Alternatively you can position 3D objects in a section view as described below.
Positioning, moving and rotating 3D Objects
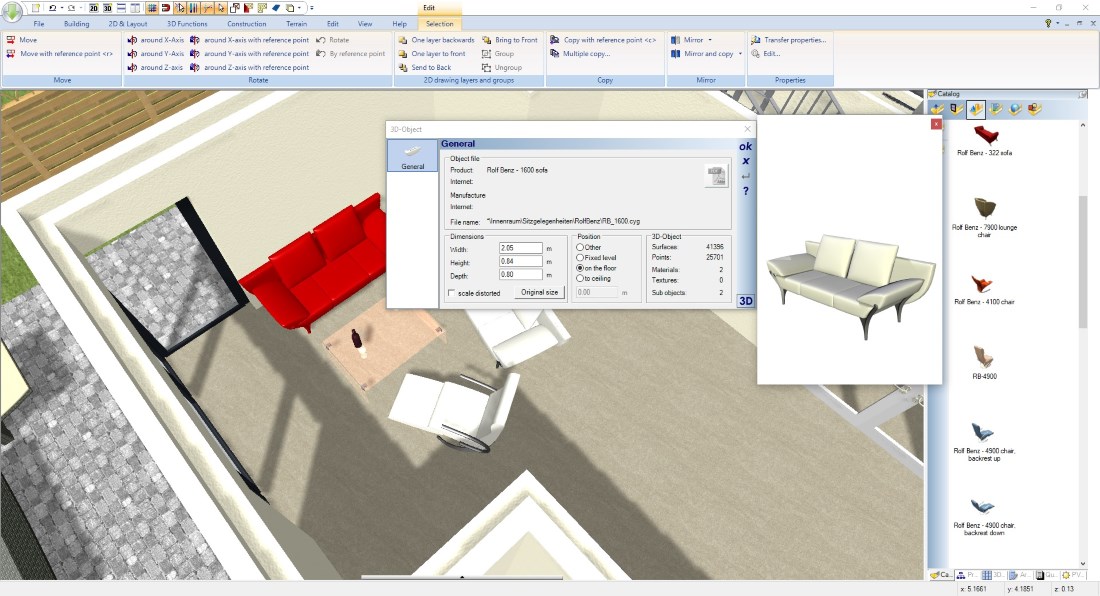
As with all other elements in Visual Building, you can only edit 3D objects if they are selected. Selected objects are marked in red in both 2D and 3D.
If you have selected an element with a left mouse click, the selection toolbar with the permitted operations appears automatically. The most important for 3D objects are:
- Move with reference point
- Rotate around the Z-axis, rotate around the Z-axis with a reference point (the Z-axis in our coordinate system is the axis vertical to the floor)
With these functions, often combined, you can place 3D objects exactly in your floor plan.
The following video shows the insertion of 3D objects and the subsequent exact moving and rotating:
Moving and changing the height of 3D objects in section views
If you want to place 3D objects at a certain height, e.g. for wall units in a kitchen, the easiest way is in a section view. Create a temporary section view at the appropriate position, place your object and then close the section view.
Here is a short video:
Here is a short video:
File Formats of 3D Objects
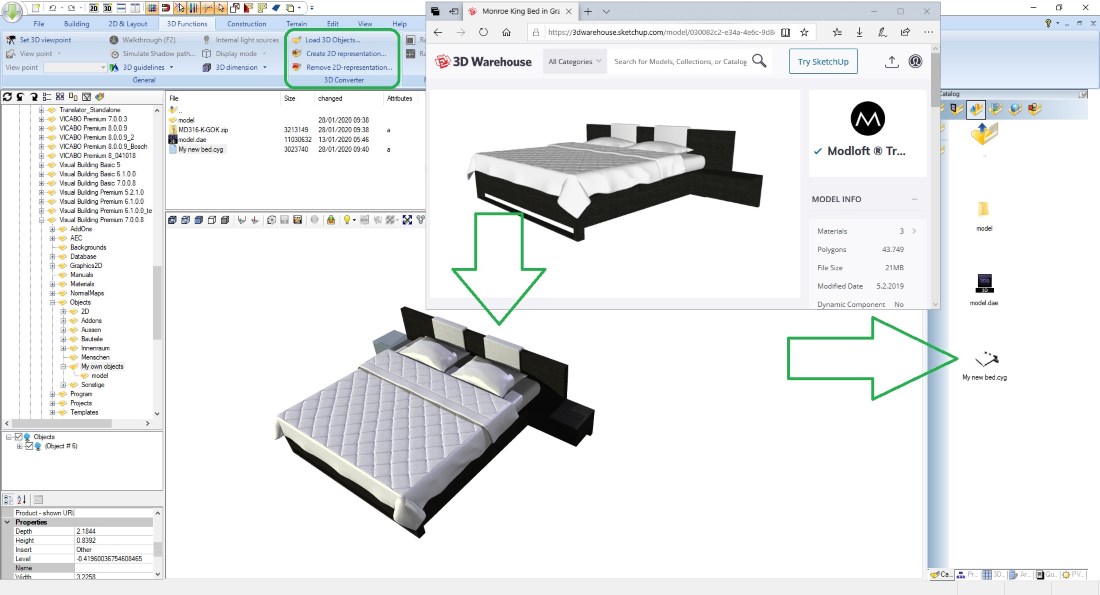
Visual Building uses 3D objects in our self-developed file format (* .cyg). All 3D objects in our catalogs are therefore in this format.
Of course, we also support the use of 3D models in the most common 3D formats from other software providers. Both for the import and for the export of 3D objects. The supported formats include * .skp (Sketchup 2016), * .obj, * .fbx (Autodesk FBX), * .3DS (3D Studio), * .dae (Collada),… ..
Of course, we also support the use of 3D models in the most common 3D formats from other software providers. Both for the import and for the export of 3D objects. The supported formats include * .skp (Sketchup 2016), * .obj, * .fbx (Autodesk FBX), * .3DS (3D Studio), * .dae (Collada),… ..
If you want to use a 3D object in one of these formats in Visual Building, you first have to import and convert it to our own 3D format. There is the PlugIn 3D converter, which is included in our PRO and Premium version to allow this. It will load the 3D objects and save them in our catalogue with the new file format. More about converting 3D objects.
Scaling 3D-Objects
3D objects are ready-to-use and their geometry cannot be changed. They can only be scaled, i.e. changed in size, and covered with other materials or textures to change their appearance.
When scaling or changing the size, you must take into account that this change can be made proportionally, i.e. entering a value for the height then changes the depth and width to the same extent. Or the change is distorted, i.e. only the height is changed, depth and width remain unchanged. You define how a 3D object is scaled in its properties dialog.
When scaling or changing the size, you must take into account that this change can be made proportionally, i.e. entering a value for the height then changes the depth and width to the same extent. Or the change is distorted, i.e. only the height is changed, depth and width remain unchanged. You define how a 3D object is scaled in its properties dialog.
Visual Building Basic

Has been developed as an easy to use design and visualisation tool for self builder,extentions..
£60.00
List price
List price
£39.00
Special online offer
Special online offer
Visual Building PRO
Used by all user groups specifically to create professional plans...
£120.00
List price
List price
£99.00
Special online offer
Special online offer
Visual Building Premium
Our most powerful design and visualisation tool specifically created for ...
£180.00
List price
List price
£149.00
Special online offer
Special online offer