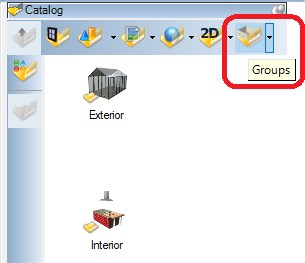
Groups - alias Mini-Projects
Contrary to what is likely expected, groups are not just a combination of already existing 3D objects from the catalogue, but mini-projects that can contain almost all constructive elements, but of course also combined with 3D objects.
Groups are inserted in your project as usual via drag and drop.
And you can easily add your own new groups in the catalogue by selecting various elements with a mouse frame and saving them as a group via the right mouse button context menu.
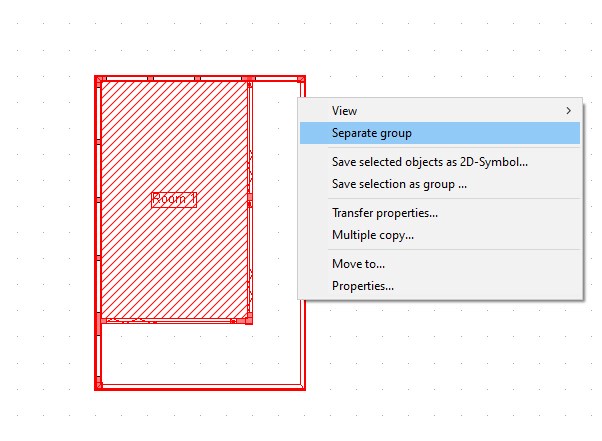
The special thing about it is that groups can be separated into their previous elements once added to your current project. That means walls, roofs, 3D constructions, etc., simply all parts of a group become the original elements again and can be edited and changed as usual.
With this function, you can save all components of a planning, whether it is a garage, balcony, kitchenette, seating groups, or even completely furnished rooms to the catalogue and use them in your current and in future projects, simply by drag and drop. You can also drop an existing group, a kitchenette for example, in your project and have a kitchen designed in seconds. If the group doesn’t fit exactly to your needs and ideas, just select, separate and change it as you wish.
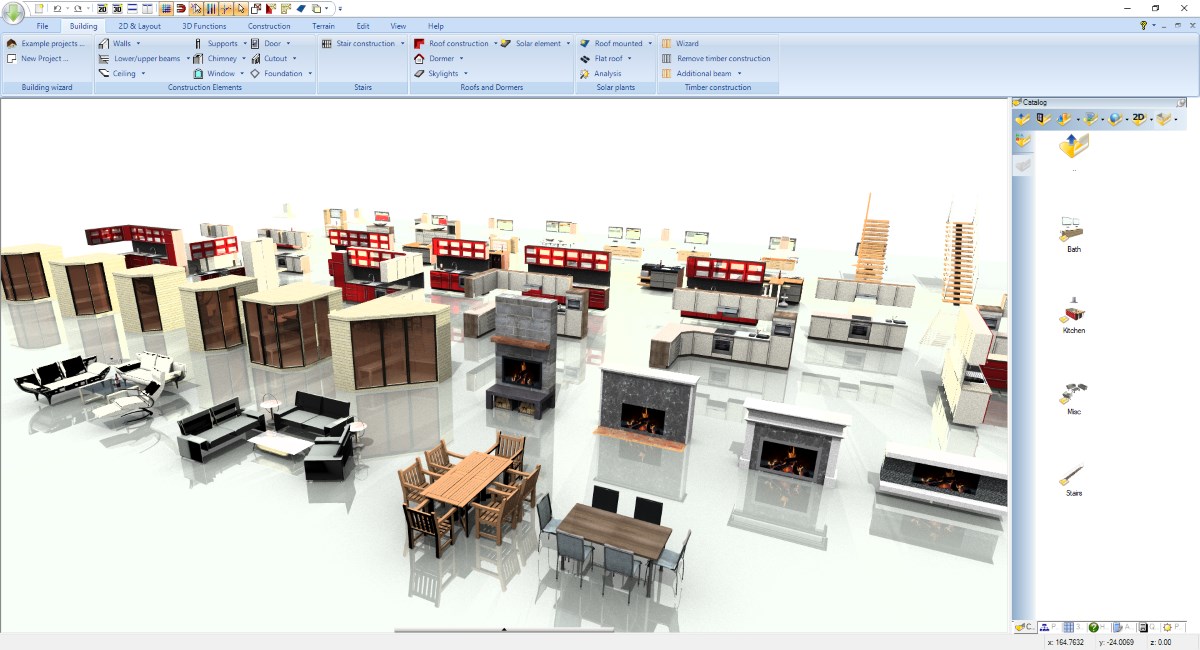
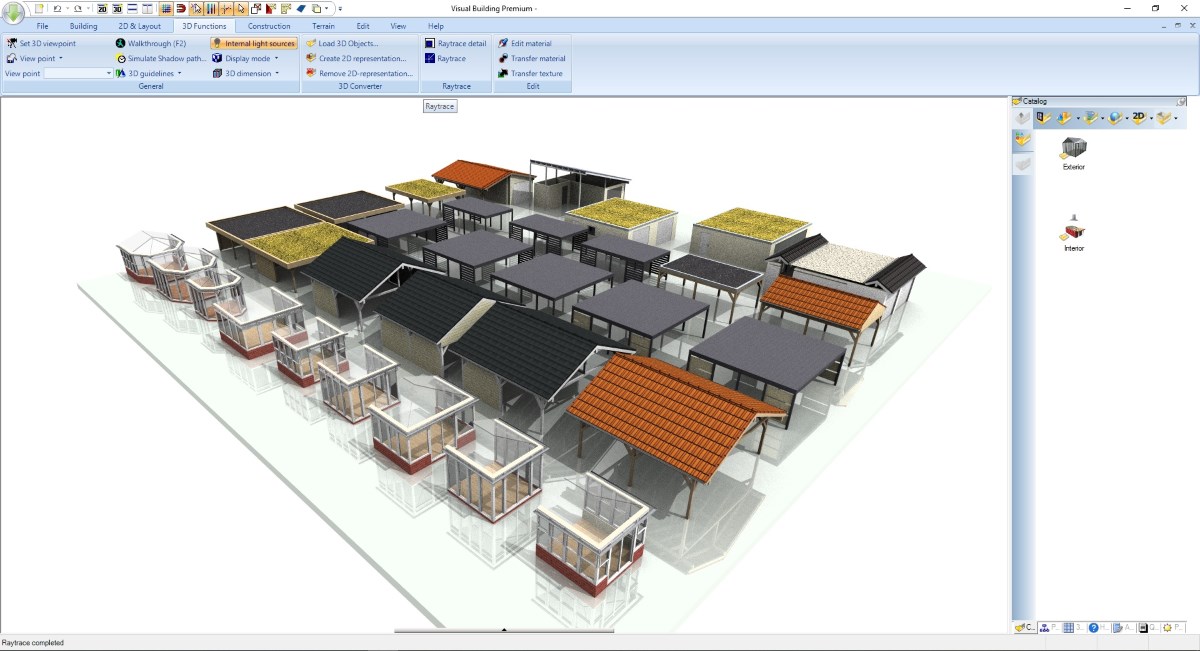
In this new catalogue we have already added numerous sample groups (approx. 250 with version 9), partly to show the various options, but also very practical examples that cannot be used as simple 3D objects, e.g. Garages, carports, saunas, garden houses etc..
Groups are inserted in your project as usual via drag and drop.
And you can easily add your own new groups in the catalogue by selecting various elements with a mouse frame and saving them as a group via the right mouse button context menu.
The special thing about it is that groups can be separated into their previous elements once added to your current project. That means walls, roofs, 3D constructions, etc., simply all parts of a group become the original elements again and can be edited and changed as usual.
With this function, you can save all components of a planning, whether it is a garage, balcony, kitchenette, seating groups, or even completely furnished rooms to the catalogue and use them in your current and in future projects, simply by drag and drop. You can also drop an existing group, a kitchenette for example, in your project and have a kitchen designed in seconds. If the group doesn’t fit exactly to your needs and ideas, just select, separate and change it as you wish.
In this new catalogue we have already added numerous sample groups (approx. 250 with version 9), partly to show the various options, but also very practical examples that cannot be used as simple 3D objects, e.g. Garages, carports, saunas, garden houses etc..
More topics
Inserting and moving groups in your project
Groups are loaded as usual via drag and drop from the catalogue and inserted into your planning with a left mouse click.
There are differences to the placement of 3D objects. Groups cannot be rotated with the mouse wheel while being inserted and you cannot change the reference point with CTRL + W during insertion.
To place or rotate groups, use the normal tools, rotate around a reference point or move with a reference point from the selection toolbar when you have selected the group.
A short video about inserting groups
Editing and separating groups
Unlike 3D objects or 2D symbols, groups cannot be changed in size, i.e. they cannot be scaled, since they basically consist of "real building components".
You can't texture parts of a group or change materials in it. If you want to do this, you must first separate the group into its individual parts and then edit the resulting elements as usual.
A group is separated via the right mouse button context menu when a group is selected.
Separating a group cannot be undone. If necessary, you would have to delete the separated parts and insert the group again from the catalogue.
A short video how to separate and edit a group, in this example a kitchenette
Saving your own groups to the catalogue
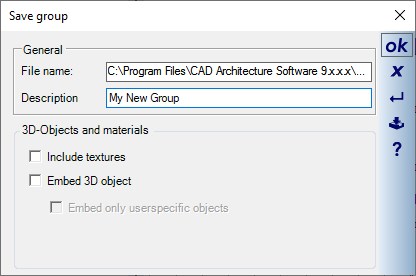
To save a group, you must select the different components, which is usually easiest by drawing a frame in a 2D view, simply by keeping the left mouse button pressed. Just as you may be used to saving 2D symbols.
With the context menu of the right mouse button you get the option "Save selection as group ...".
Read more about groups in our PDF Manual
With the context menu of the right mouse button you get the option "Save selection as group ...".
Read more about groups in our PDF Manual
Visual Building Basic

Has been developed as an easy to use design and visualisation tool for self builder,extentions..
£60.00
List price
List price
£39.00
Special online offer
Special online offer
Visual Building PRO
Used by all user groups specifically to create professional plans...
£120.00
List price
List price
£99.00
Special online offer
Special online offer
Visual Building Premium
Our most powerful design and visualisation tool specifically created for ...
£180.00
List price
List price
£149.00
Special online offer
Special online offer