House Plan Layout
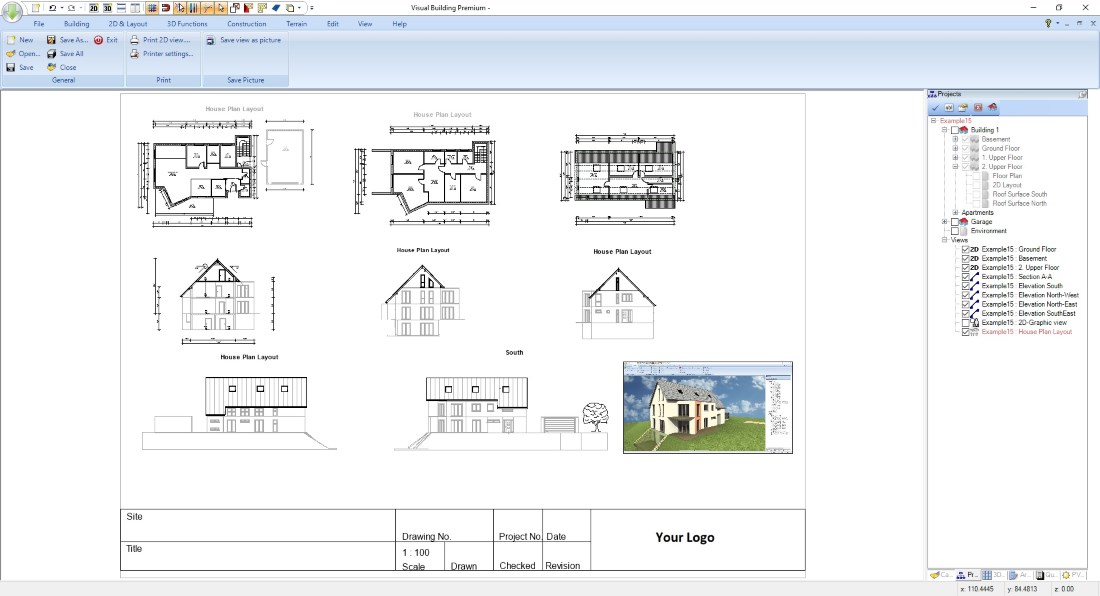
House Plans in this article refer to plans in which multiple views of your Visual Building project are arranged on a single sheet. This requires the PlugIn Plan Layout which is part of our PRO and Premium versions.
In a Plan Layout you can use all views you have already created in your Visual Building project. That includes existing floor plans, 2D section views, and elevations. So there is no additional drawing work, you only have to insert and arrange what you have already designed.
In a building with three floors for example, you usually have three floor plans, four elevations and one or more 2D-section views.
Read more about "Building Plans and architectural drawings".
In a building with three floors for example, you usually have three floor plans, four elevations and one or more 2D-section views.
Read more about "Building Plans and architectural drawings".
Just to avoid misunderstandings:
- If you need a drawing that shows only the floor plan of a single floor on one sheet, a Plan layout is not required and would only cause unnecessary work. All this can be easily achieved in normal 2D views in Visual Building, including frames from a 2D symbol, title blocks, etc.
- The same applies if you only want to create a section drawing or an elevation view on one sheet
- Only if you want to show multiple floor plans and views on a single sheet, a house plan layout is required
More topics
- Navigation in 2D / 3D
- Create Floor Plans
- Windows and doors
- Insert stairs
- Copy Floors
- Roof Construction
- Building Plans
- Section views
- Elevation views
- 3D Floor Plans
- Become a 3D Architect
- Loft conversion
- Fire Escape Plans
- 2D Symbols
- House Plan Layout
- 3D Constructions
- Home Design Software
- Using 3D Objects
- Using Textures
- Material properties
- 3D Visualization
- Timber frame
House Plan Layout – Create a new plan layout view
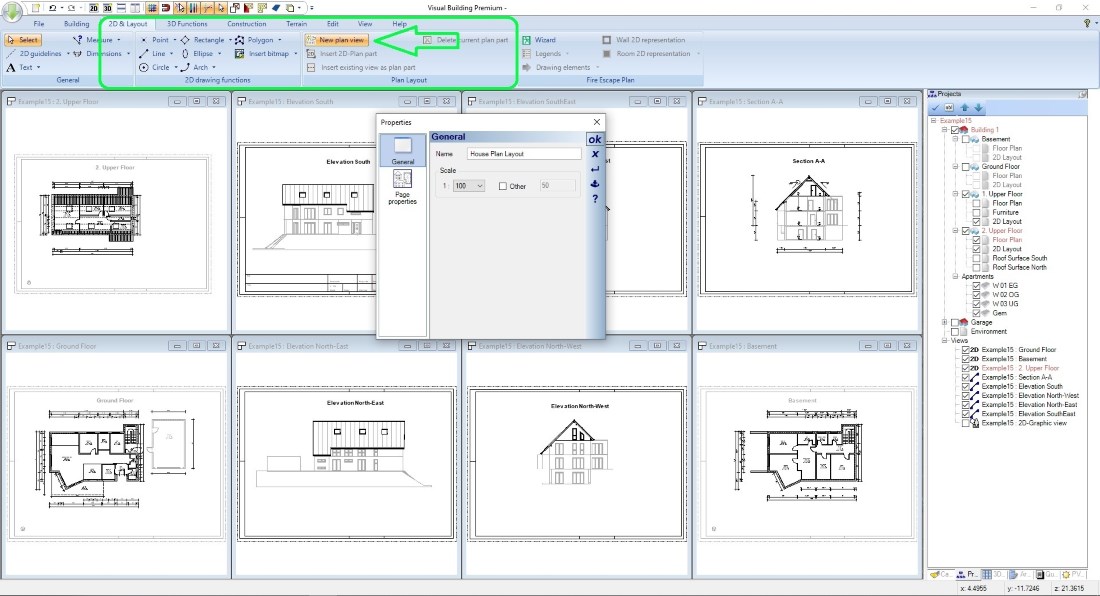
Arranging more than one architectural 2D drawing is done in a special plan layout view type, which you create on the Ribbon 2D & Layout. Click on "New Plan View".
In the following dialog, insert a name for your new view, set the scale and specify paper size and orientation, A0 – Landscape for example.
Note: to arrange multiple views on one sheet, you need a larger paper size, not A4 or A3. Even if you do not have an A0 printer, you can later export the entire plan in A0 as a PDF file and then print on smaller paper such as A3. The scaling of the sheet from A0 to A3 then automatically happens in your PDF software driver
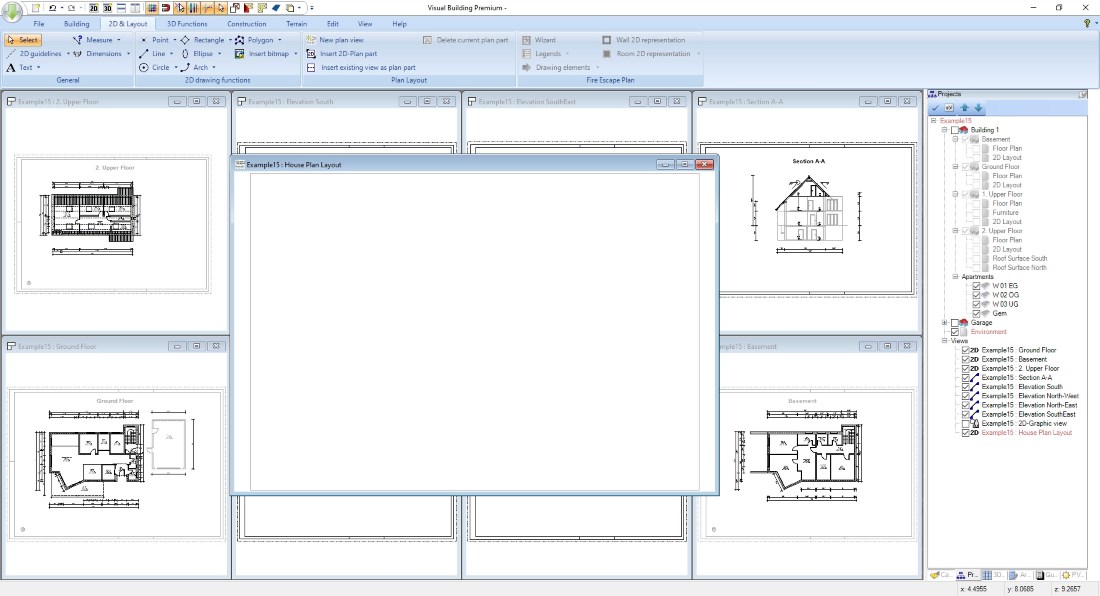
When you close the dialog with OK, a new and empty 2D plan layout view is created, symbolizing the chosen paper format with a grey frame.
House Plans – insert existing 2D views
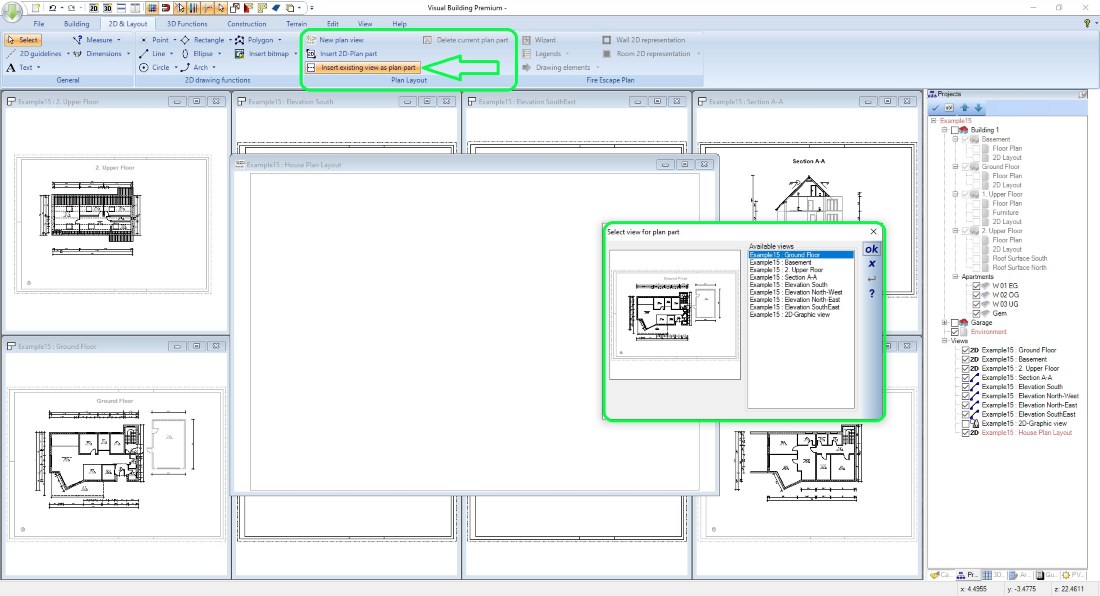
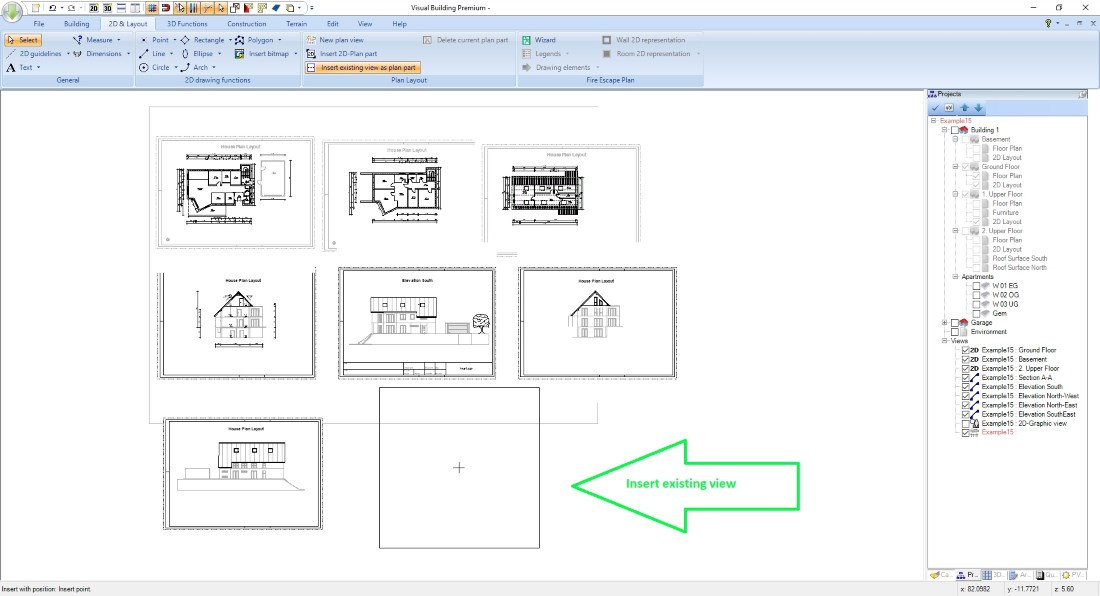
The views or drawings that you insert in a plan layout view are called plan parts. All existing 2D views in your project can be easily added with a mouse click.
To do this, select one from the list of existing views and close the dialog with OK.
The new plan part is added as a rectangular preview to your mouse cursor and inserted with a left mouse click.
The position is initially irrelevant. As a next step, you must resize the plan part and move it to its final position.
House Plans – select and edit plan parts
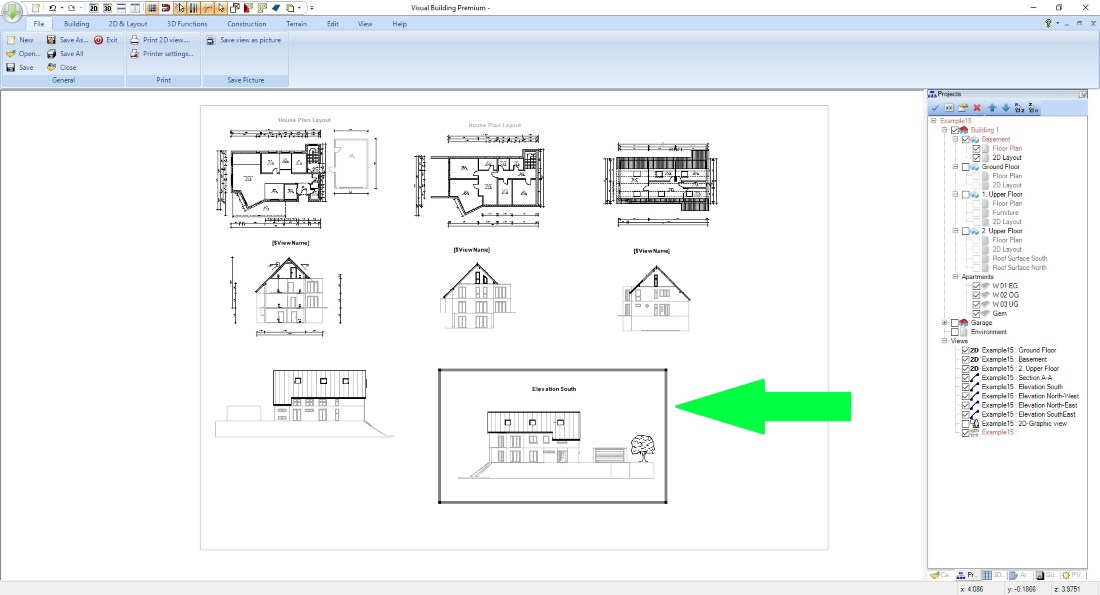
The plan layout view now contains „copies” of your original 2D drawings as so-called plan parts. You can select and edit these drawing elements with a left mouse click on such a plan part. An activated plan part shows a grey frame. Now you can resize it by hovering along the corners. The cursor indicates when you have reached a position to resize the frame. You probably already know all this from other software programs. The same applies to moving a plan part to a new position.
Scaling of Plan Parts
As in all other views in Visual Building, the plan view and also the plan parts are generally drawn to scale. This also means that you can not zoom inside a plan part, so you can not change the size of the content relative to the rest of your plan. Zooming would change the scale, which is by default disabled.
Sometimes the content of a plan part is too large for an appropriate presentation. In such cases, you can select the plan part, open the context menu with the right mouse button and disable the "Keep scale" option in the properties dialog. Now you can zoom within the active part of the plan with your mouse wheel and thus change the size. Of course, the scale is now arbitrary and depends on your zoom level.
Sometimes the content of a plan part is too large for an appropriate presentation. In such cases, you can select the plan part, open the context menu with the right mouse button and disable the "Keep scale" option in the properties dialog. Now you can zoom within the active part of the plan with your mouse wheel and thus change the size. Of course, the scale is now arbitrary and depends on your zoom level.
Scrolling and moving the content of a plan part
To align the contents of plan parts, the same mouse and keyboard shortcuts for zooming, scrolling, and moving are used in active plan parts as in our normal views. This means that you can select the Plan parts and use SHIFT + mouse wheel or CTRL + SHIFT + mouse wheel to move the content left or right, up or down.
A smooth positioning is possible while you keep your mouse wheel pressed (PAN).
A complete overview of all combinations can be found in our Shortcuts PDF file which has been installed to your Windows Start menu.
A smooth positioning is possible while you keep your mouse wheel pressed (PAN).
A complete overview of all combinations can be found in our Shortcuts PDF file which has been installed to your Windows Start menu.
Finishing your House Plans
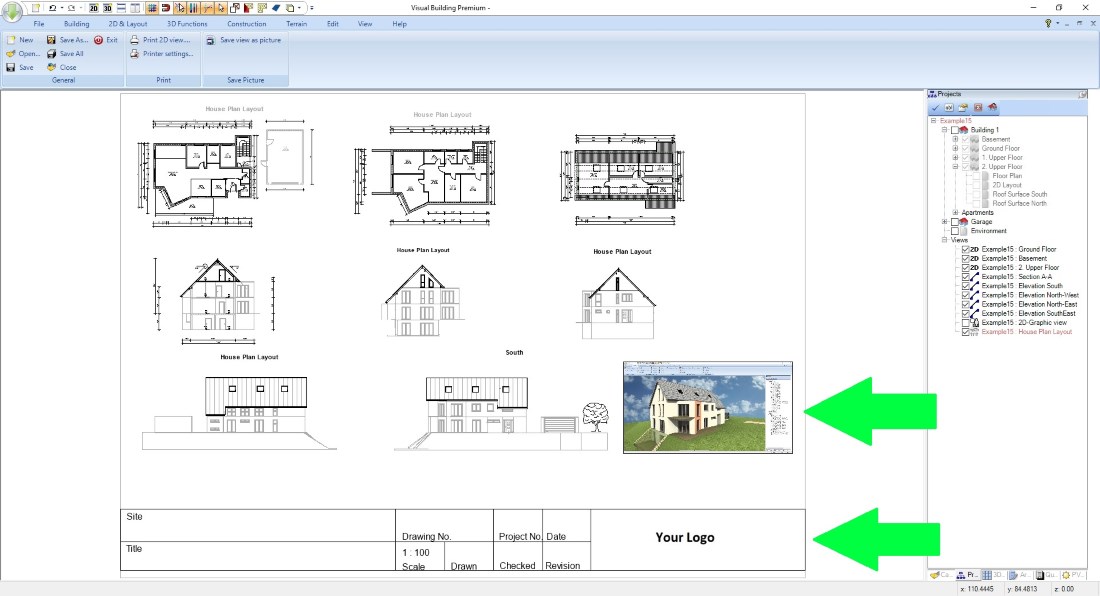
Regardless of the plan parts, you can draw in your plan view as usual and also use 2D symbols for title blocks, custom drawing frames, etc. In addition, you can also insert images rendered from a Visual Building 3D view or just photos.
You only have to make sure that at the time of insertion no plan part is active, otherwise the elements end up in the plan part and not in the plan view.
The following video is based on our alternative (older) toolbar user interface and gives a first impression about Plan Layout at around 2:50
You only have to make sure that at the time of insertion no plan part is active, otherwise the elements end up in the plan part and not in the plan view.
The following video is based on our alternative (older) toolbar user interface and gives a first impression about Plan Layout at around 2:50
Visual Building Basic
Has been developed as an easy to use design and visualisation tool for self builder,extentions..
£60.00
List price
List price
£39.00
Special online offer
Special online offer
Visual Building PRO
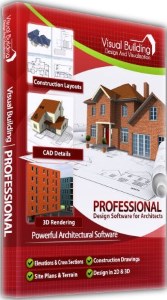
Used by all user groups specifically to create professional plans...
£120.00
List price
List price
£99.00
Special online offer
Special online offer
Visual Building Premium
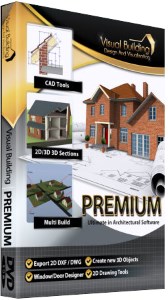
Our most powerful design and visualisation tool specifically created for ...
£180.00
List price
List price
£149.00
Special online offer
Special online offer

