Materials for your 3D Home Design
As already mentioned in our guide about textures, it is the material of a surface in 3D that determines its appearance. The material properties determine how bright or dark a surface appears, whether it is transparent or matt or glossy.
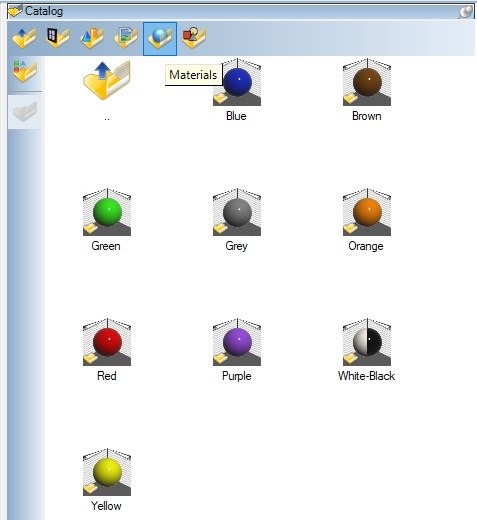
Materials can contain a texture, but must not. You will find both in our material catalog. In order not to duplicate catalog content unnecessarily, the main contents of the material catalog are the standard elements for our components as well as all types of colors in different settings, matt, glossy and transparent. So if you want to change the material of a window from white to anthracite in Visual Building, look for such a color in our Material Catalog and not under Textures. Colors are properties of the material and therefore you can use them without textures.
If you are looking for wood or roof tiles you have to search in the texture catalog. A typical application for a material would be metal or glass.
The navigation through the material catalog is the same as for textures and 3D objects. Double-clicking on a material entry opens the properties dialog of a material, from which you can also create and save your own materials if required.
More topics
Properties of materials
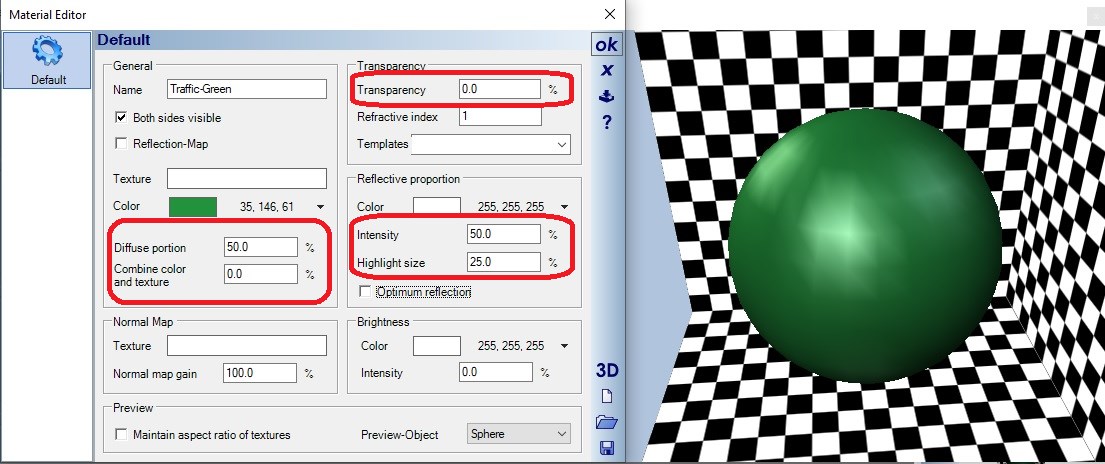
The Material Editor Dialog contains a number of properties, which are rarely used. In this chapter we focus on the really important ones.
Diffuse portion: determines how much light a surface reflects and thus how bright or dark it appears.
Reflective proportion: decides how matt or glossy a material looks. Optimum reflection is only used for mirrors or really completely reflecting surfaces.
Transparency: determines how transparent a material is. Our default window material e.g. uses 80% transparency
Combine Texture and Color: can be used to color a texture. In our catalog for example we have some single-color gray textures, e.g. for wood. If the wood should look as if it was painted, you can adjust the color here and a wood texture that was once gray turns into green wood
Using materials in 3D views
Materials are used in exactly the same way as textures, so simply drag and drop them onto a surface in 3D. Materials are also transferred as described in our guide about textures.
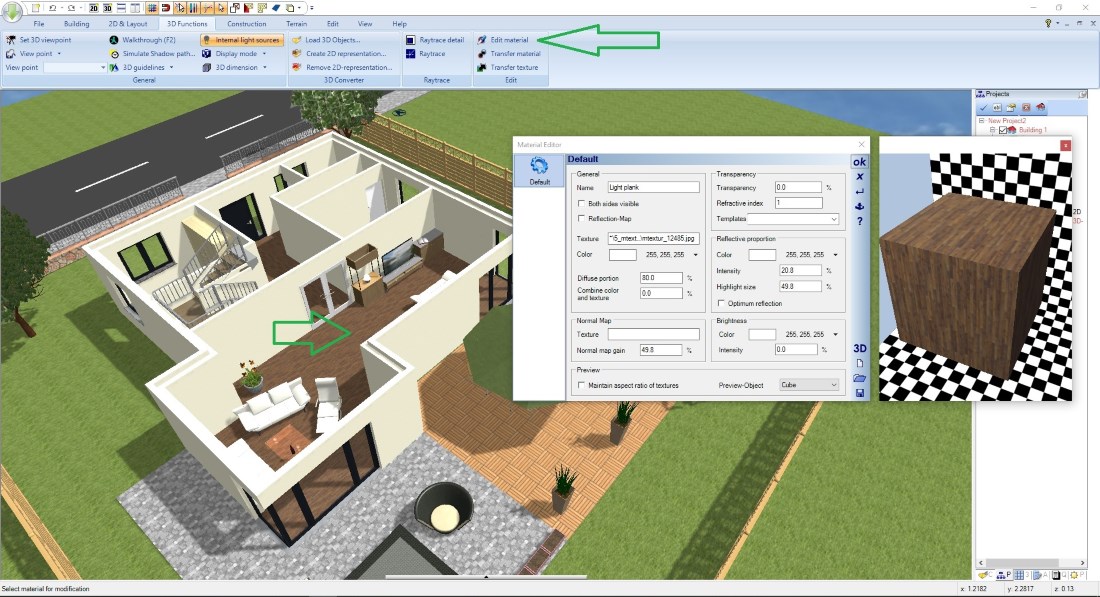
Editing materials directly in 3D views
You can edit the properties of a material on an element directly in a 3D view. There is a separate function "Edit material .." on the Ribbon 3D Functions.
The principle is quite simple. Start the tool with the a click on that button, click in the 3D view on the element whose surface you want to edit and the Material Editor dialog opens.
Make your changes there. You could then transfer the changed material to other elements if necessary. This process is also shown in our guide about textures.
If you are finished with your 3D home design and you want to produce high quality renderings from your 3D view, we will show you that in a separate article.
Visual Building Basic

Has been developed as an easy to use design and visualisation tool for self builder,extentions..
£60.00
List price
List price
£39.00
Special online offer
Special online offer
Visual Building PRO
Used by all user groups specifically to create professional plans...
£120.00
List price
List price
£99.00
Special online offer
Special online offer
Visual Building Premium
Our most powerful design and visualisation tool specifically created for ...
£180.00
List price
List price
£149.00
Special online offer
Special online offer