Starting in August, we will commence a new pratical course in how to build a porch using Visual Building. The walls and foundations are already covered in earlier tutorials, and so in this tutorial we will concentrate on the roof structure.
It is possible to achieve a close approximation with the Roof Wizard, especially when used with the advanced roof editing tools in the Visual Premium version, however not every roof design and feature is possible and so this tutorial will demonstrate how to construct a roof using the 3D tools.
Click on images to zoom
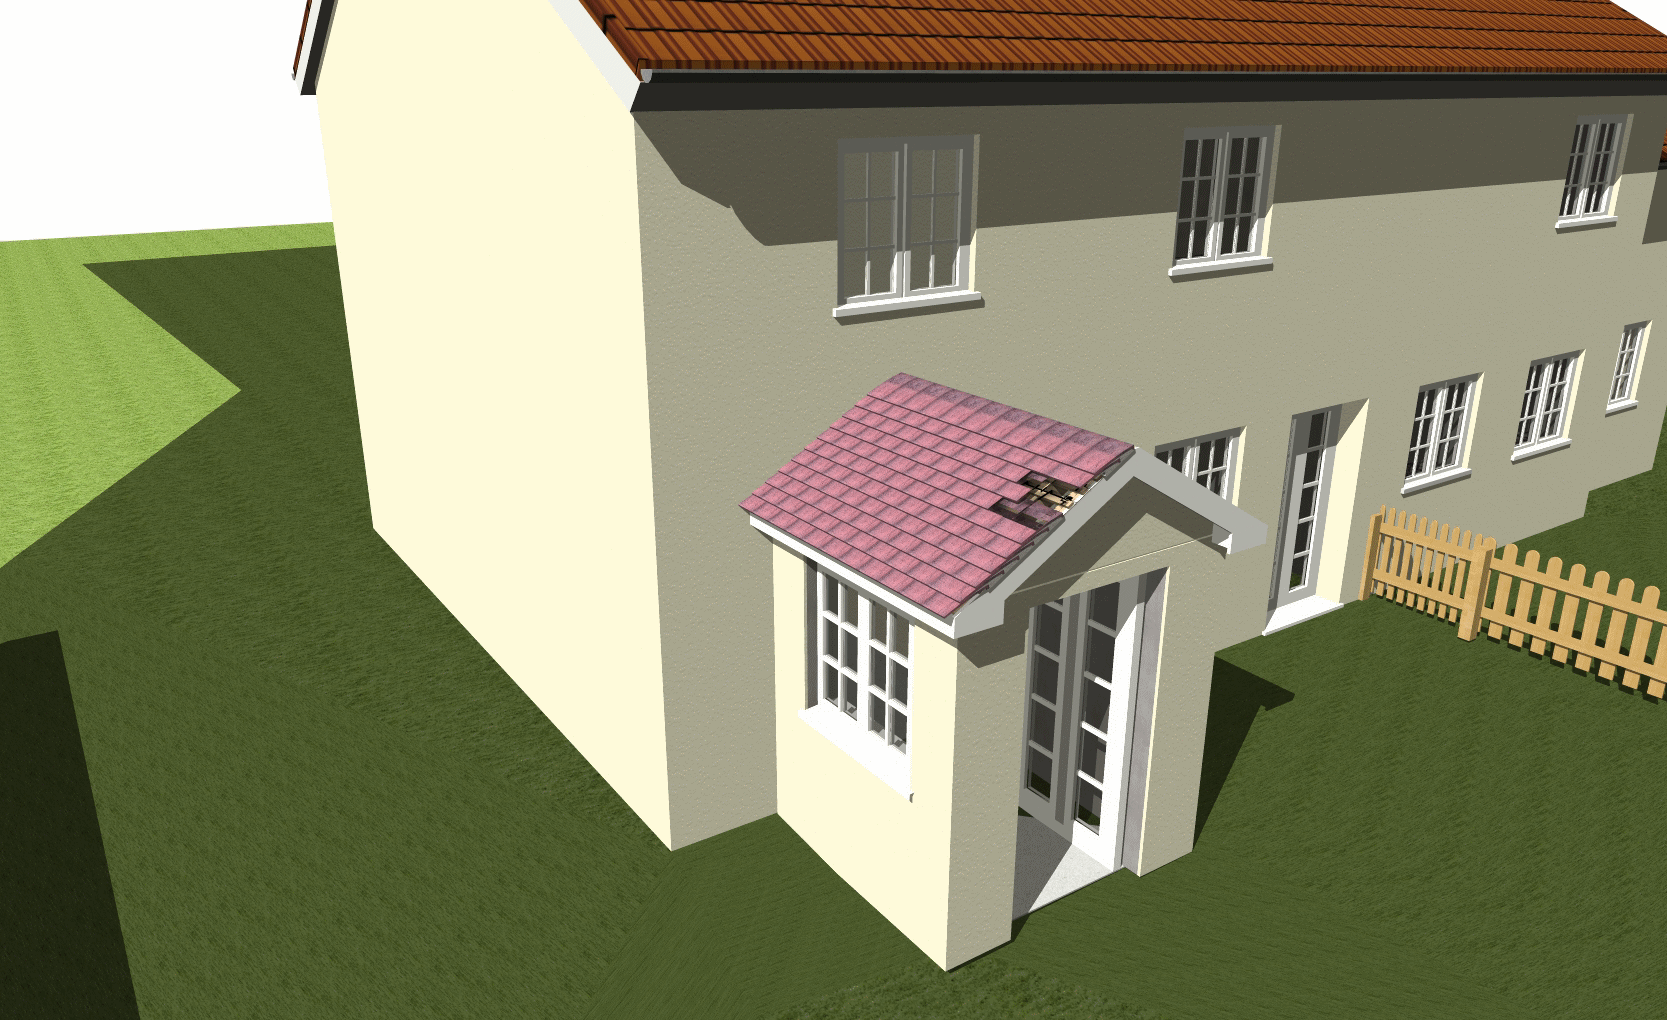
The porch in question, will have less than 3 sq m footprint with a ridge height no higher than 3m. Although our example is based on a single block wall using insulation panels, we will also cover how to compensate using brick and block and timber frame methods, specifically for placing the wall plate.
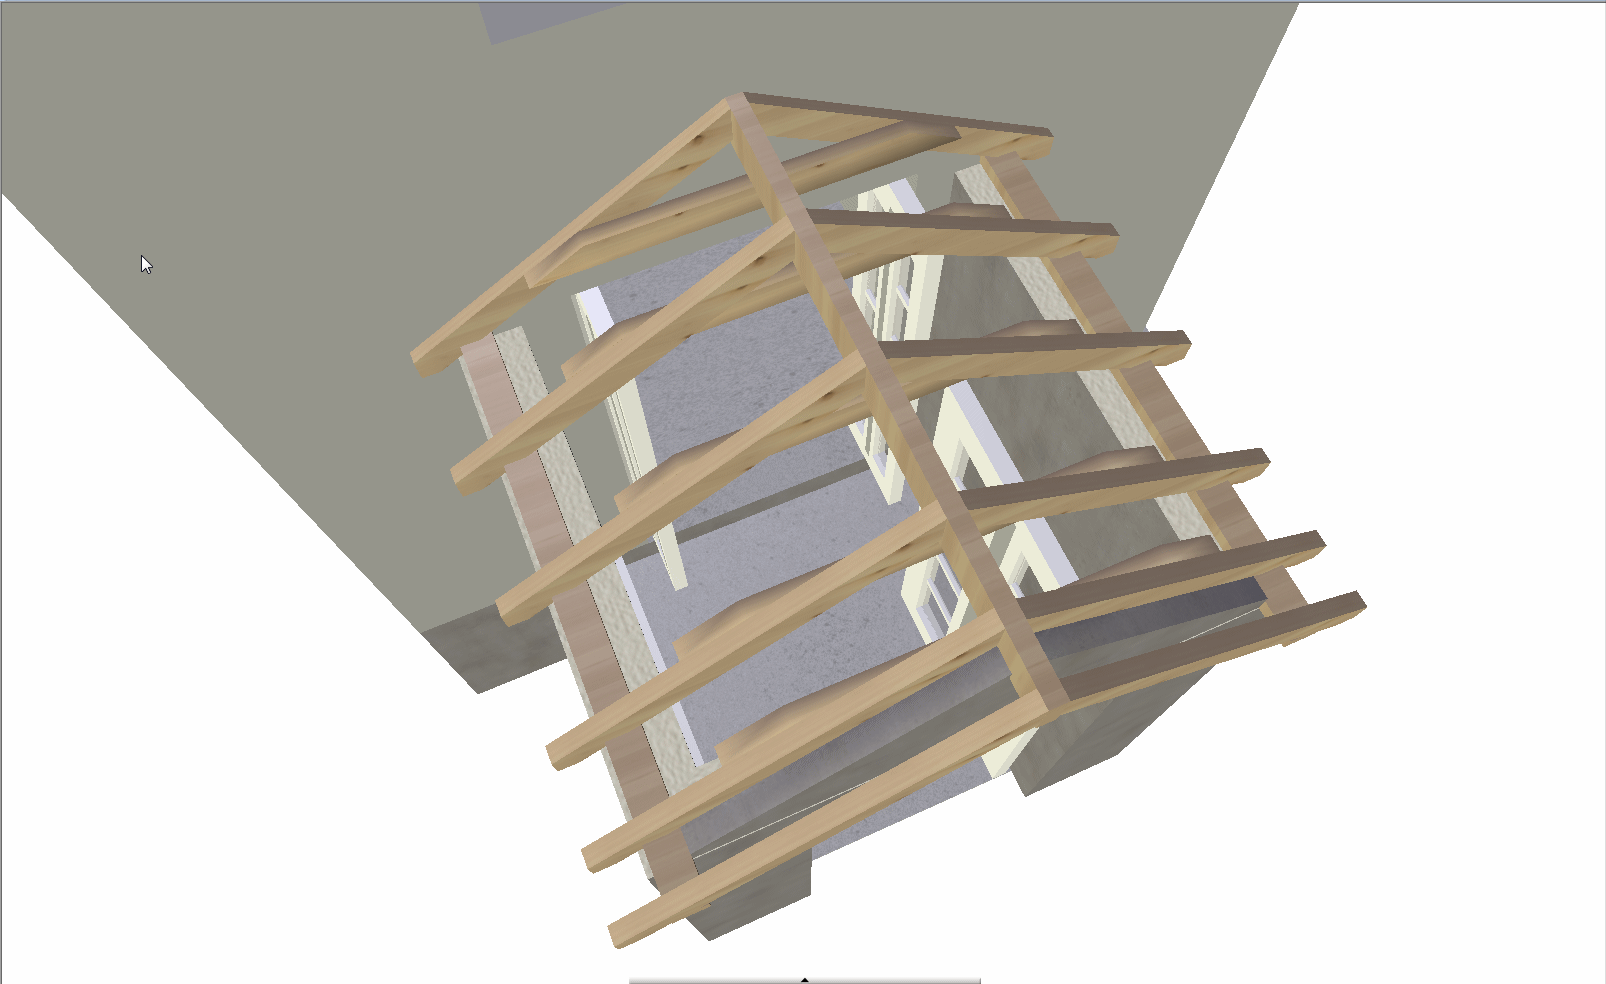
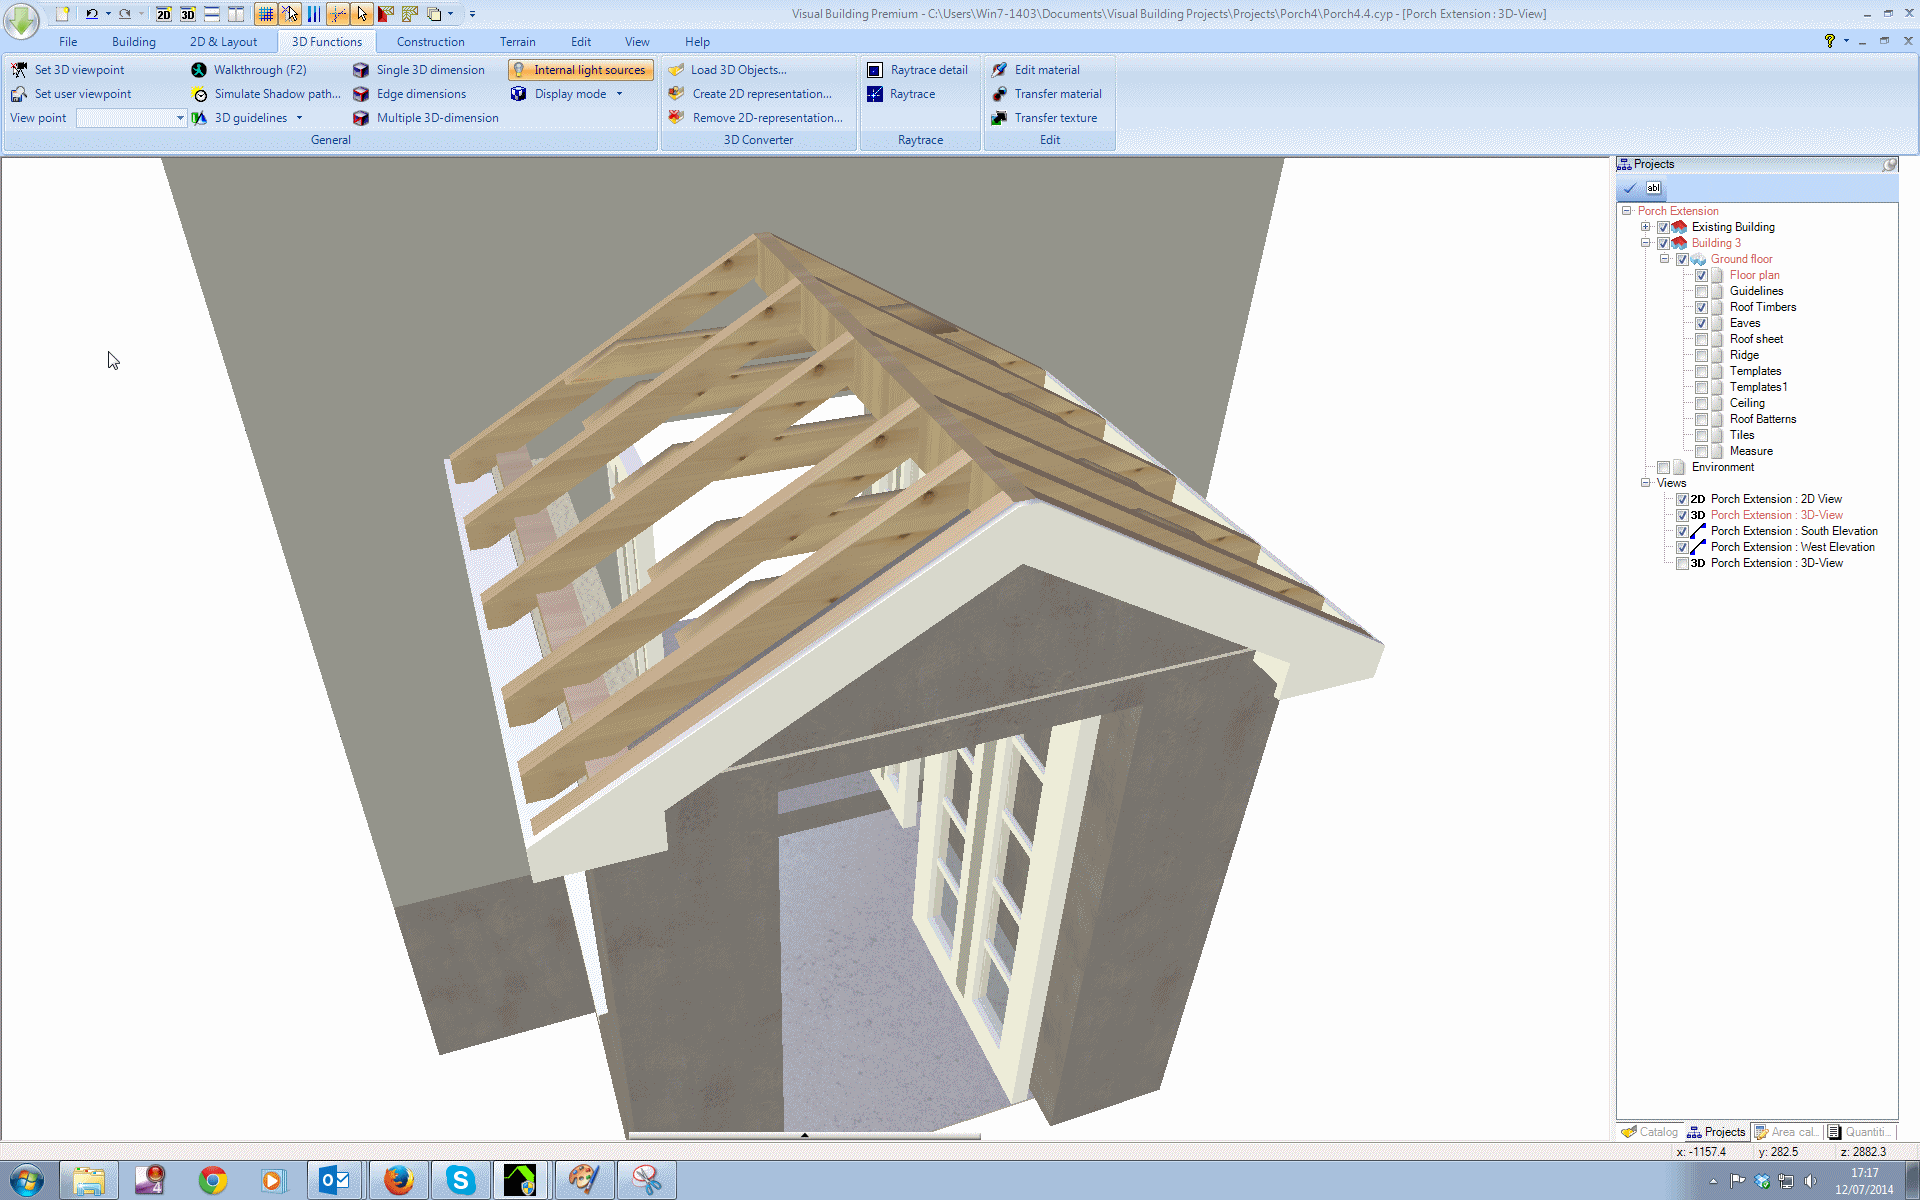
We will show you how to create your roof structure including rafters, wall plate and ridge board manually and independent of the roof wizard. The rafters will include birdsmouth cuts, and rafter cuts to support the facsia and soffit..
We will demonstrate how to easily create your own eaves, fascia and soffit detail independent of the roof wizard. We will make extensive use of the powerful layer feature, allowing you to hide features not relevent in a view.
We then show how to design your own tile profile and create your own tile object, complete with texture.
We the show how to gauge and lay roof batterns, calculate the tile spacing and even add the tile cement and final finish.
We then will then make and add a roof ridge tile.
And finally we will add the guttering and downpipes.
Because we will be making extensive use of the 3D extrusion tool, this tutorial will only be of interest to Visual Building Professional and Premium users.
Although we will use a small porch for this tutorial, the methods and tools can be employed in any project where you require additional roof design that is beyond the capabilities of the roof design wizard.
This tutorial will also be of great use to those who still have yet to discover the mystery of roof construction.
All the above images were created entirely within Visual Building Professional, The Windows and doors were created using Visual Building Premium's Windows Construction tool