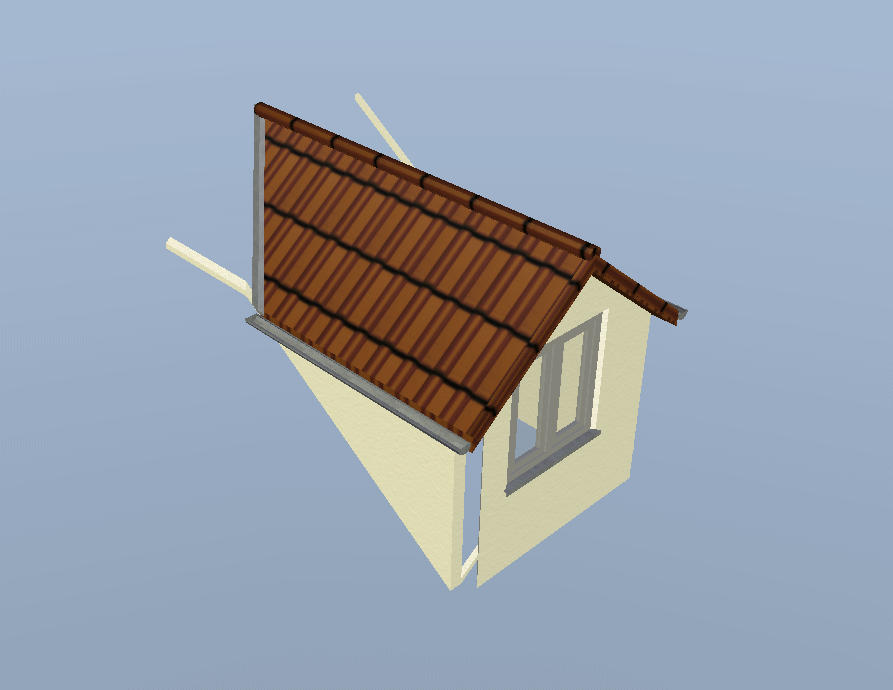
I dont think the dormer tool will support such an unusual feature. However you are using the Premium version which would allow you to save the created dormer as a 3D object, which you then load as a separate project into the 3D Converter tool. With this you can then edit that dormer as you need to. Save the edited dormer as a 3D object again and then load back into your project.
First I created a temp copy of your project and deleted all layers except for the roof.
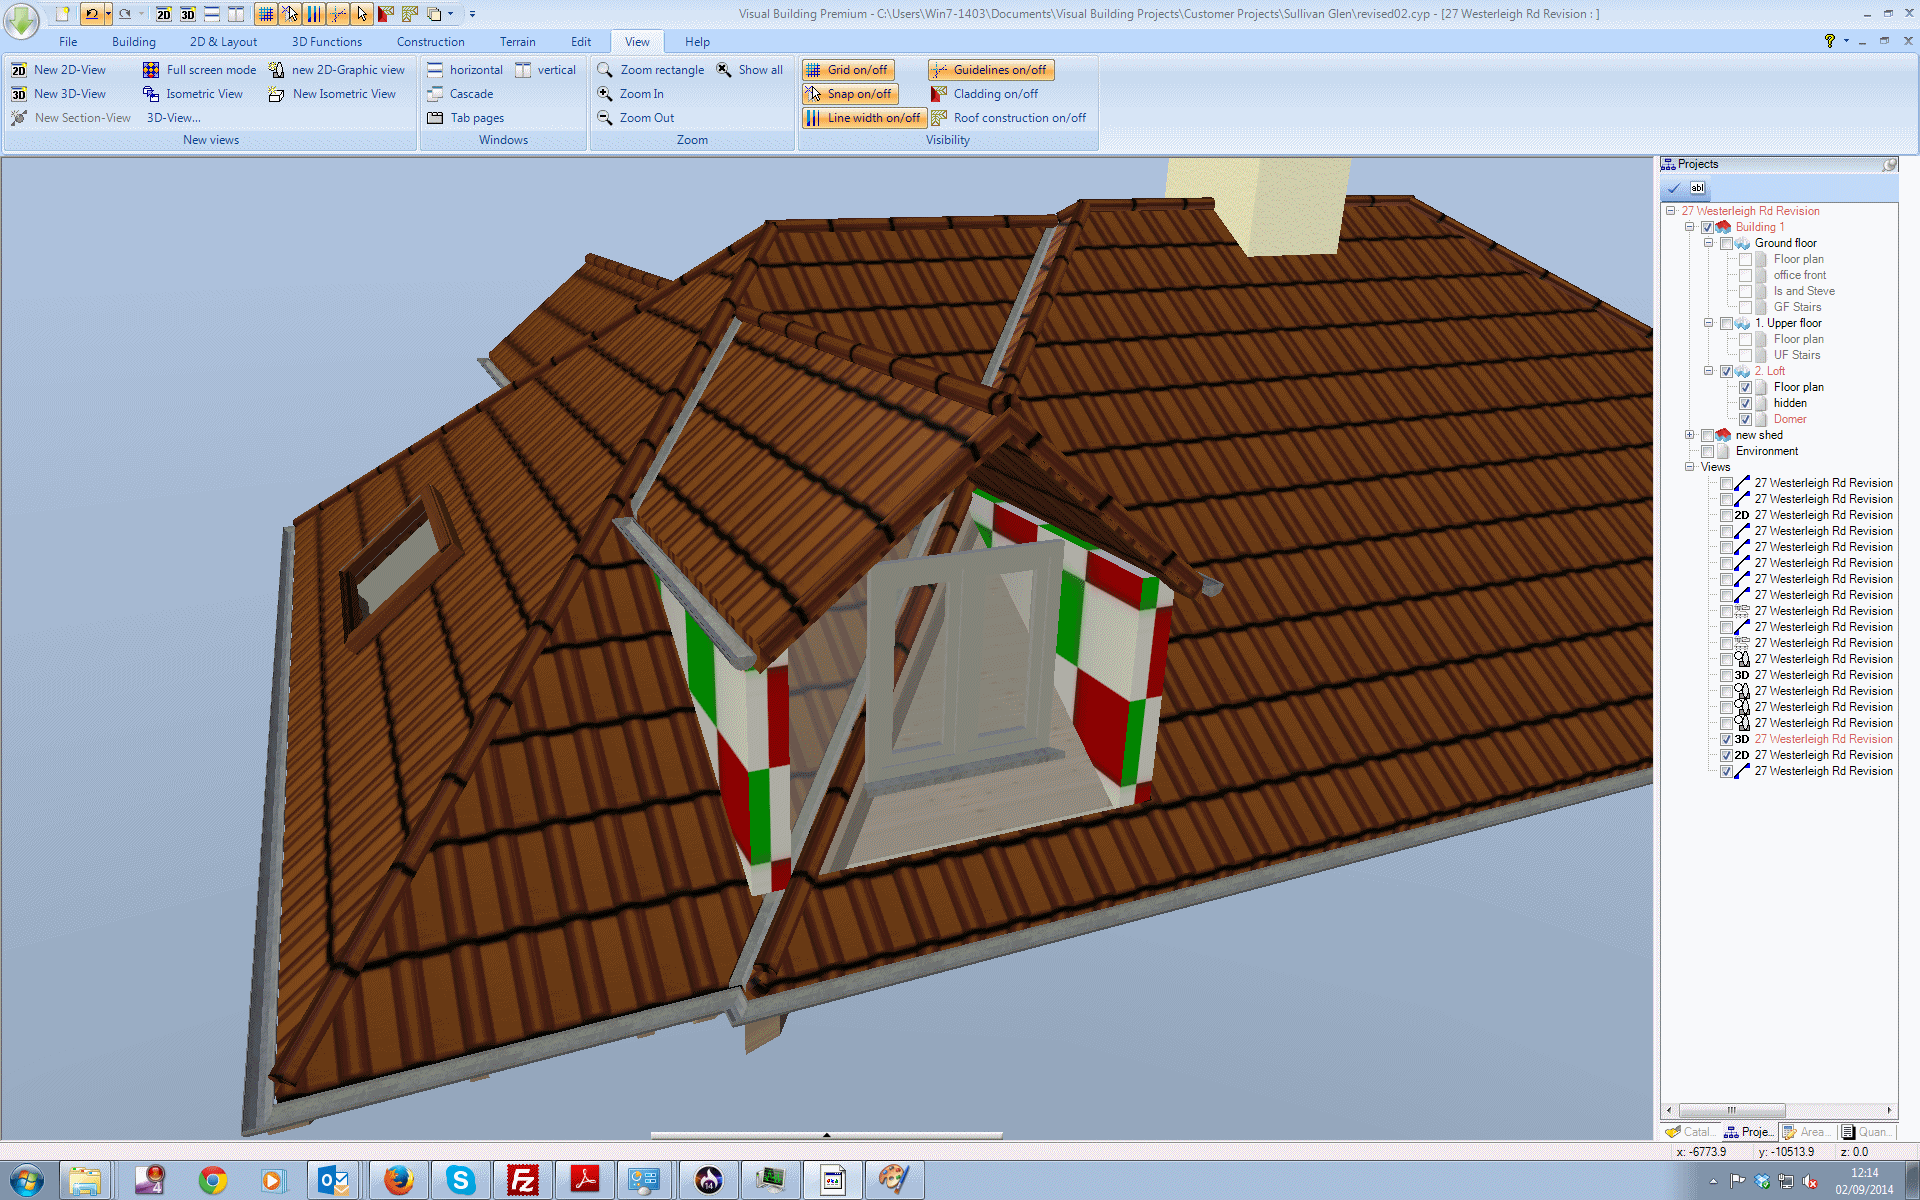
On the Loft I used the Visibility options to hide all other features so that I was left with just this:
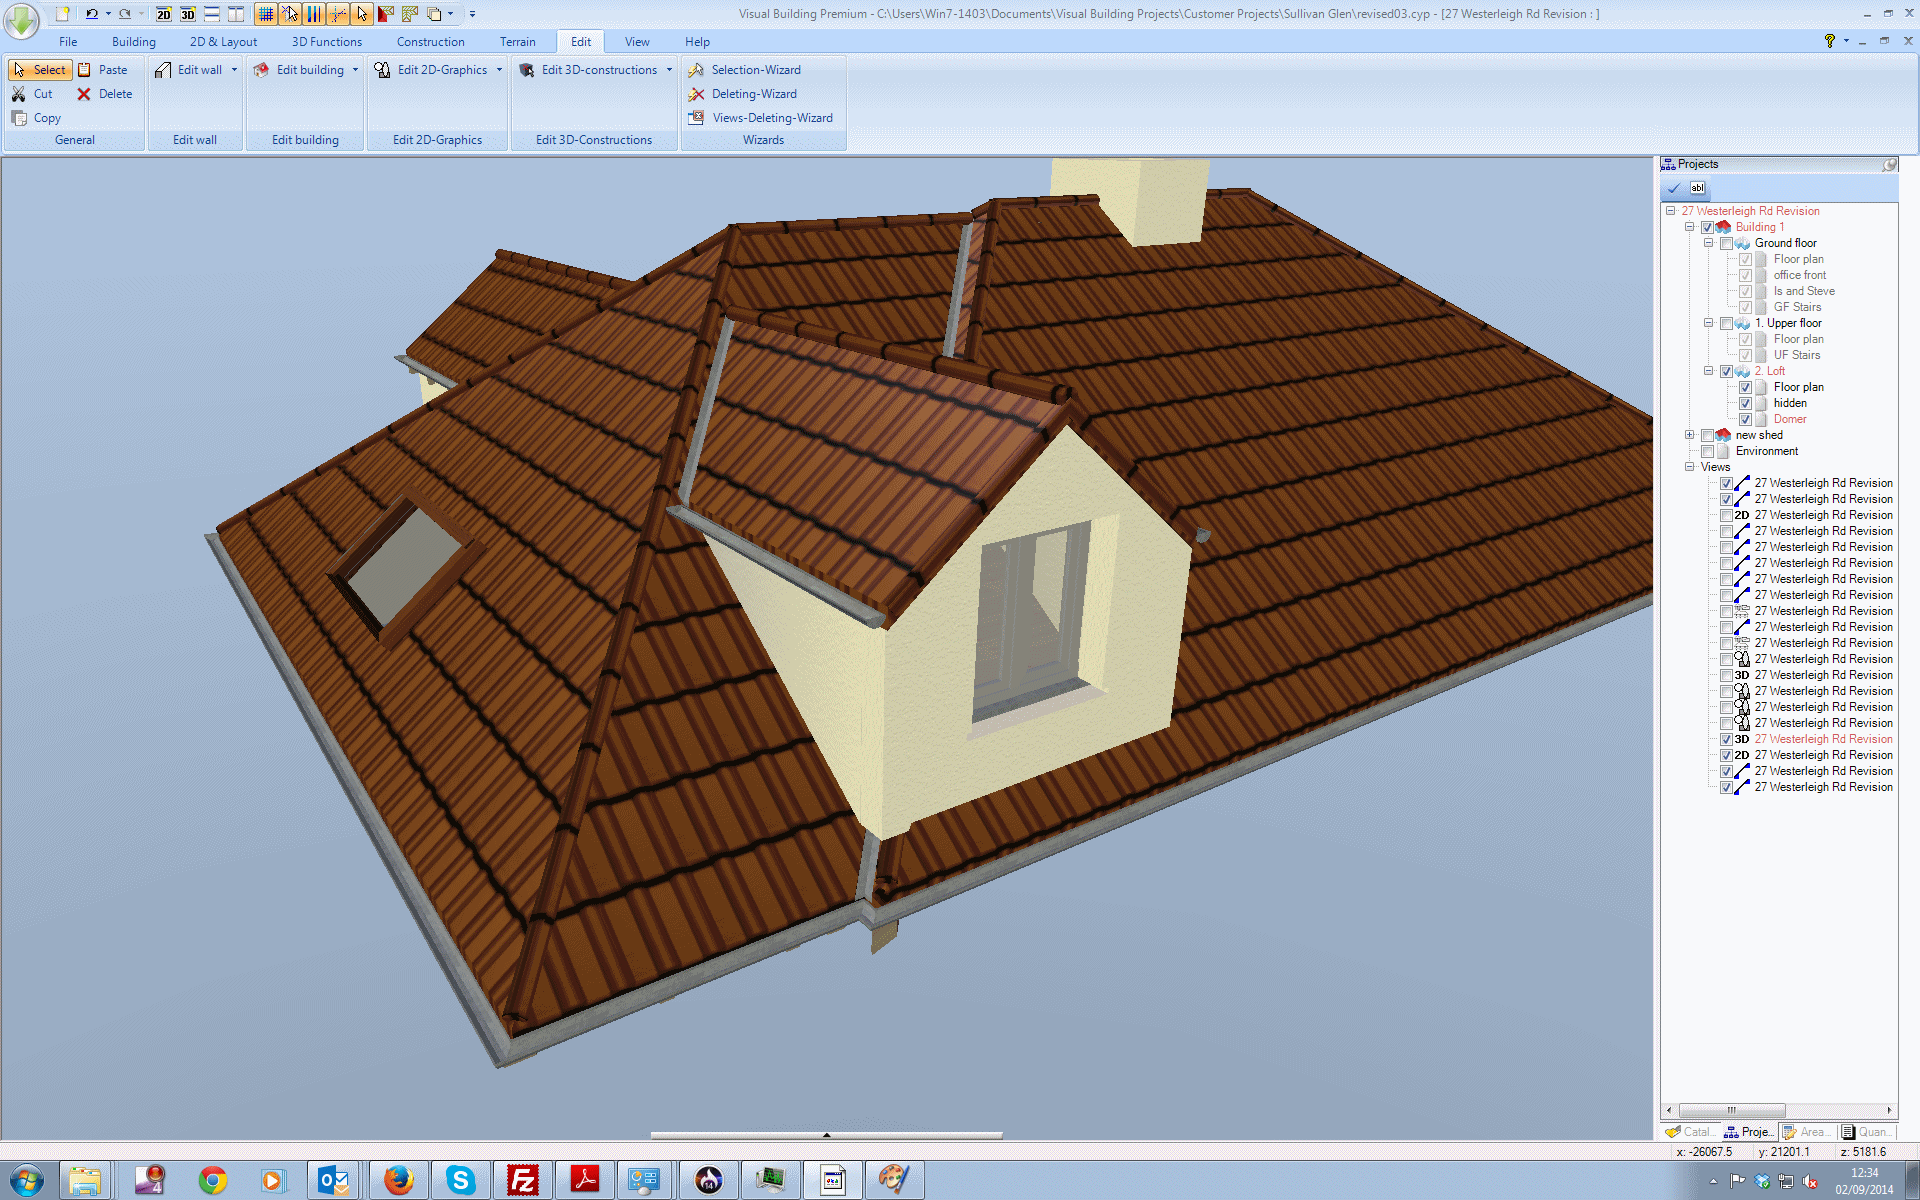
I then deleted the other dormer:
I then used Export - 3D Format - 3D Object to export the remaining dormer as a .cyg object
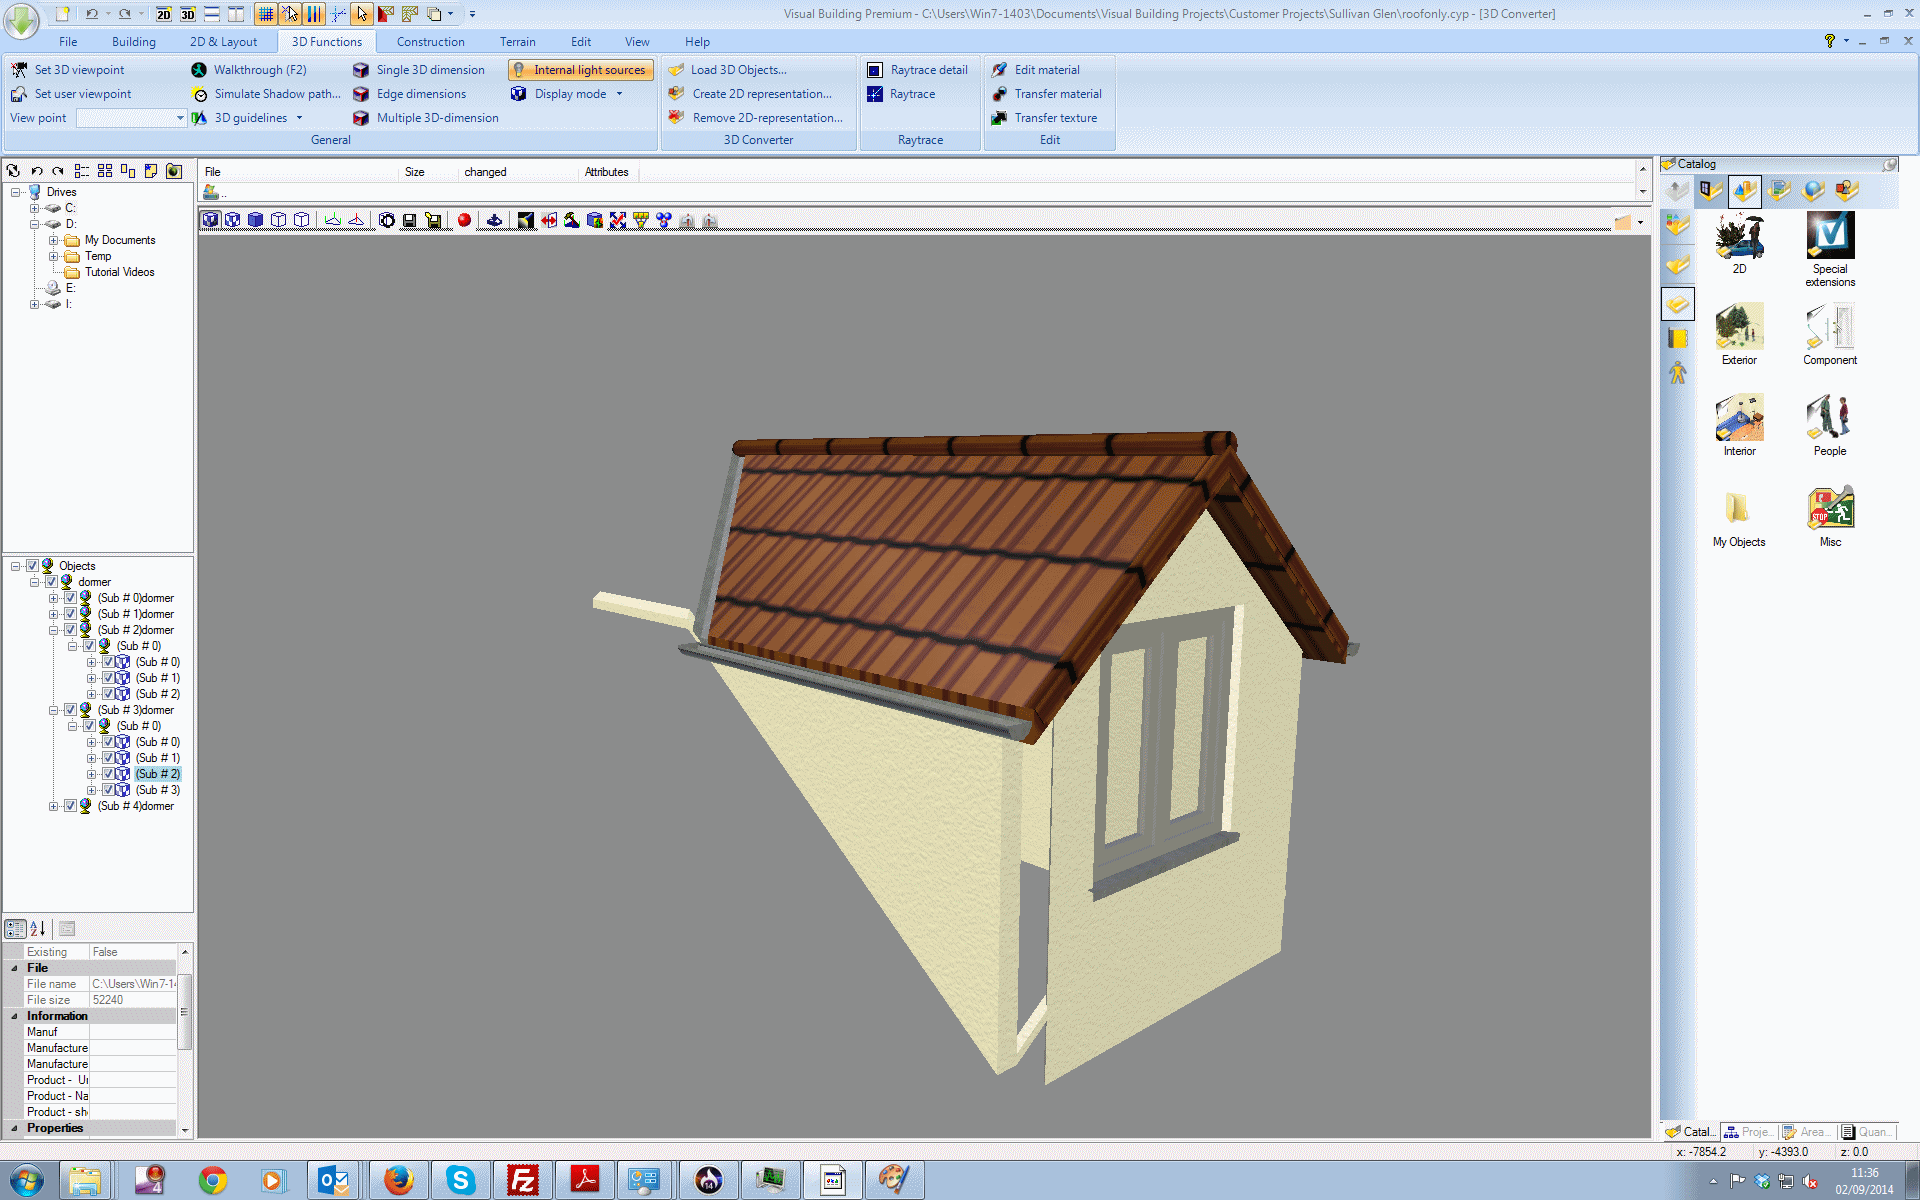
I then used the 3D Converter Tool to load the saved dormer .cyg object
I then removed the elements of the dormer that I did need, by deselecting them in the Objects tree
I found that in this case that, meant all the walls. Sometimes you can keep the walls, but this depends on the problem. Select the unwanted object in the 3D view ansd deselect it in the tree.
I then saved this as a .cyg object. This object now only contains the elements visible.
I then reloaded the main project, into which I loaded the new edited dormer object. Using the Move and Move with reference tools I placed the new dorme object. These tools are in the Selection tab Move group. Note that the selection tab only appears when you have an object selected.
I then used the 2D Polygon tools to create the wall outline to fit the roof slope in the elevation view. Use 2D & Layout tab - 2D Drawing functions - Polygon - Closed Polygon tool.
Using the Construction - Extrude solid - 2D contour I created a solid wall from the 2D outline just created. The default thickness is 1m so this has to be reduced- in my example I reduced this to 200mm. You can then use Multi copy to copy the wall to other side of dormer. The wall will need to be posisioned correctly in the plan view, using the Move with reference tool.
Repeat with a front elevation for the front wall. Extrude a hole for the window using the Edit 3D Constructions boolean difference
You can then manually cut a hole in the roof, because the roof does not recognise this object as a dormer.
This method demonstrates how you can use the 3D editing tools to replace any created object. Applicable to Visual Building Professional / Premium.