The Wienerberger brick selector is also available on Windows on their website
www.wienerberger.co.uk
. However if you need to get anything from an IPad either install DropBox on both your iPad and PC or send your self an email from your iPad to your PC.
The same applies to most of the brick and tile manufactures that provide online catalogues, (Eienerberger, Ibstock and Hanson). See also the
Brick Selector
Take note that some of the brick textures in the above mentioned catalogues are not suitable because they are not good images and the visualisation result will not be good if you do not start with a good image. The images are too large in area and are not created for repetitive tiling.
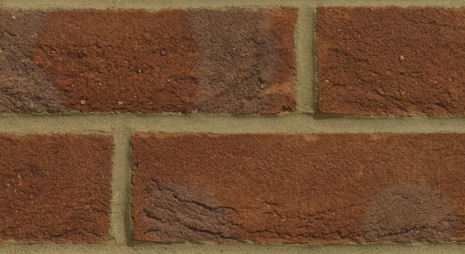
If you look at our brick samples they are smaller repetitive images as in the following image:
https://www.visualbuilding.co.uk/images/forum/01_01.bmp
Note how the image can be tiled both vertically and horizontally.
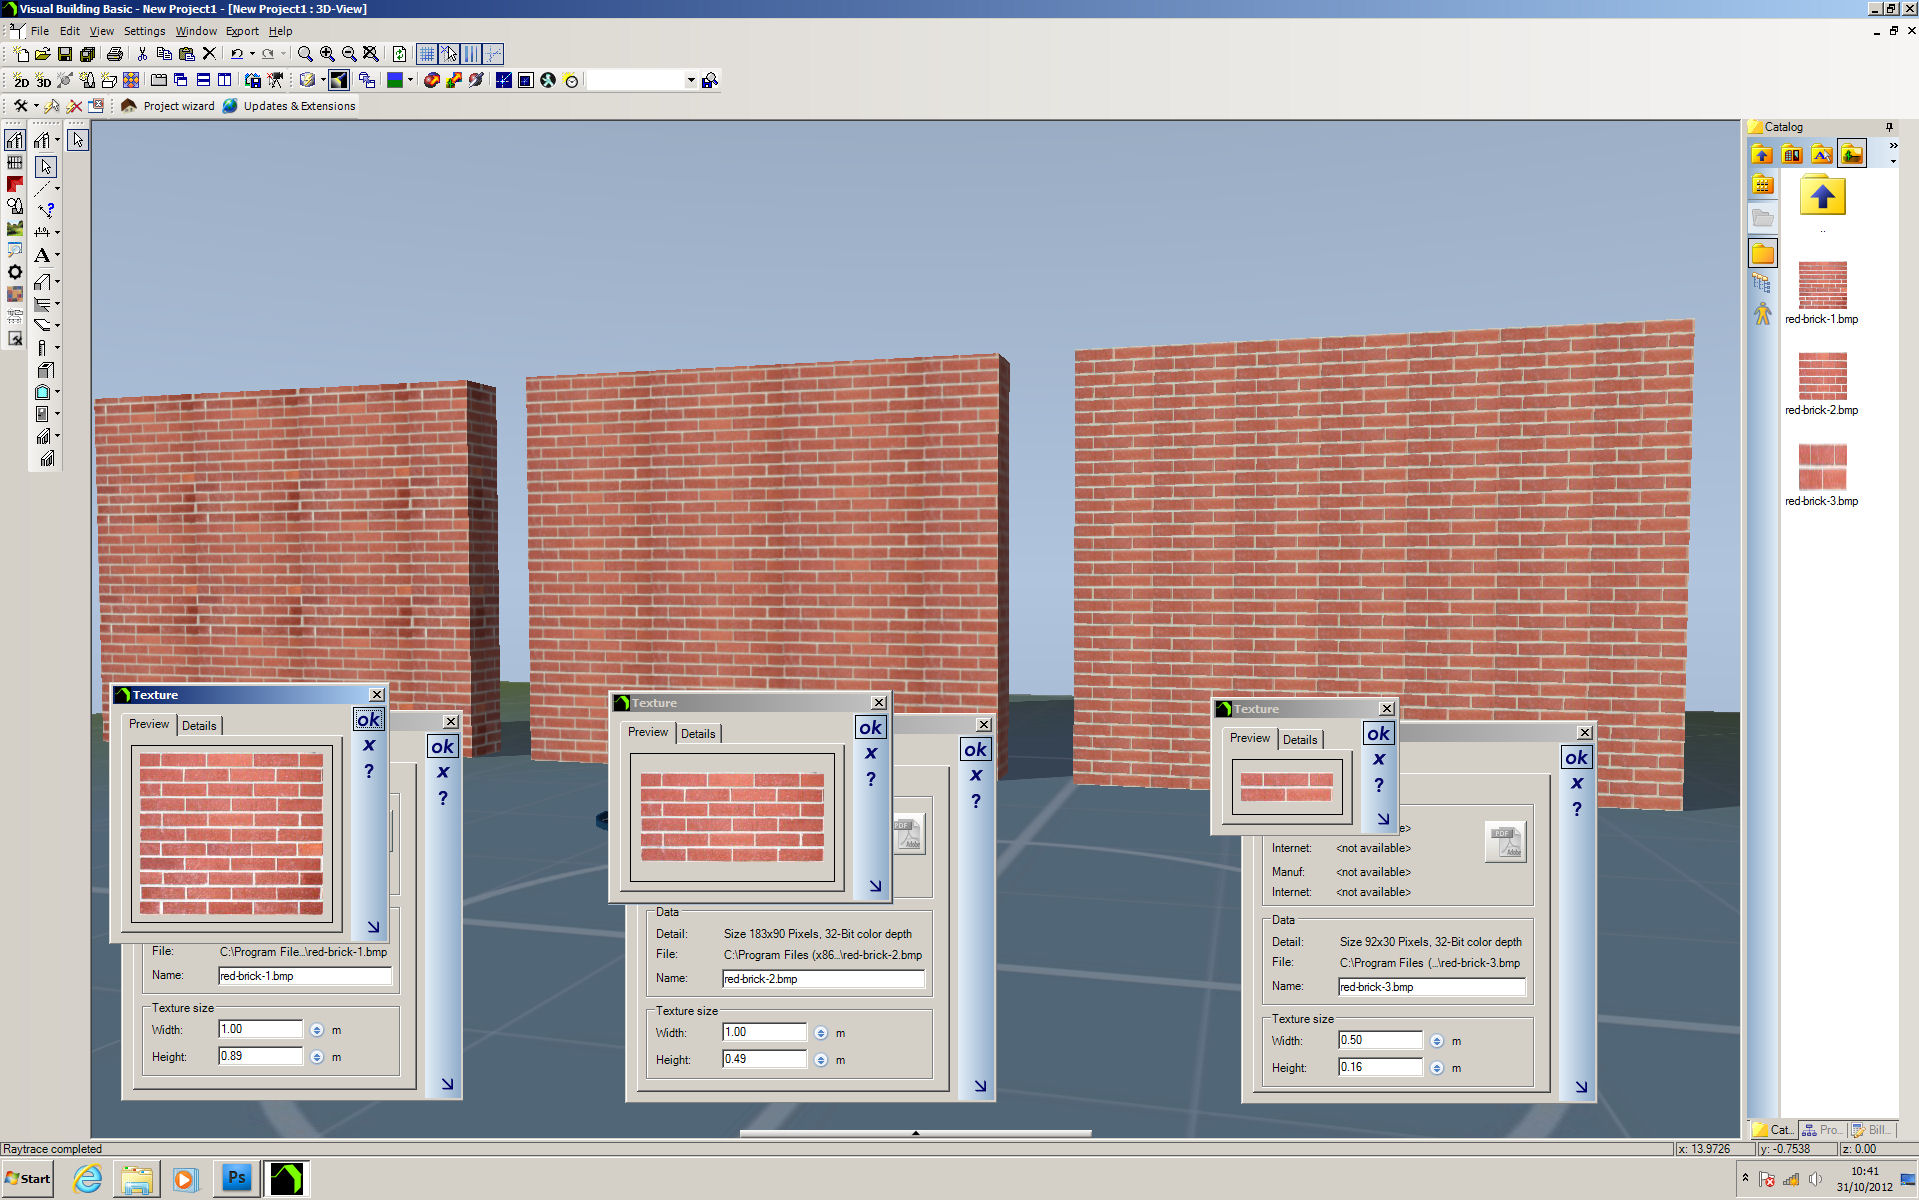
The following image demonstrates the effects of using photo as a source of an image to tile a wall. The left texture has a dark blemish in the bottom right and when tiled, the blemish is repeated for each tile and so destroys the illusion. The centre texture is the same photo but with a reduced area, the result showing an improvement with no blemish. The right texture is the same image reduced to a small area of the original photo. The result is a small improvement. Thhe original photo was of decent quality, but some photo textures can be i,prove by editing them with PhotoShop and using the Offset filter to create a tileable (seamless) image.
Note the texture size is also edited in order to maintain the brick scale.
Click image to zoom (note this is a composite screenshot)
Here are the textures used if you want to experiment yourself. Download and copy them into your texture folder and they will appear in the catalogue.
|
| https://www.visualbuilding.co.uk/images/forum/red-brick-wall1.bmp | https://www.visualbuilding.co.uk/images/forum/red-brick-wall2.bmp |